Miranum Modeler Quickstart Guide
Miranum Modeler is one component of the Miranum IDE.
This plugin provides you with a custom editor to view and edit .bpmn and .dmn files.
It enables you to build BPMN 2.0 diagrams and DMN 1.3 decision tables.
UI Overview BPMN Modeler
The Miranum Modeler opens automatically when you click on a .bpmn file in VS Code.
If you have used the Camunda Modeler in the past, the Miranum Modeler should look familiar to you.
If not, we give you a short introduction to the most important features.
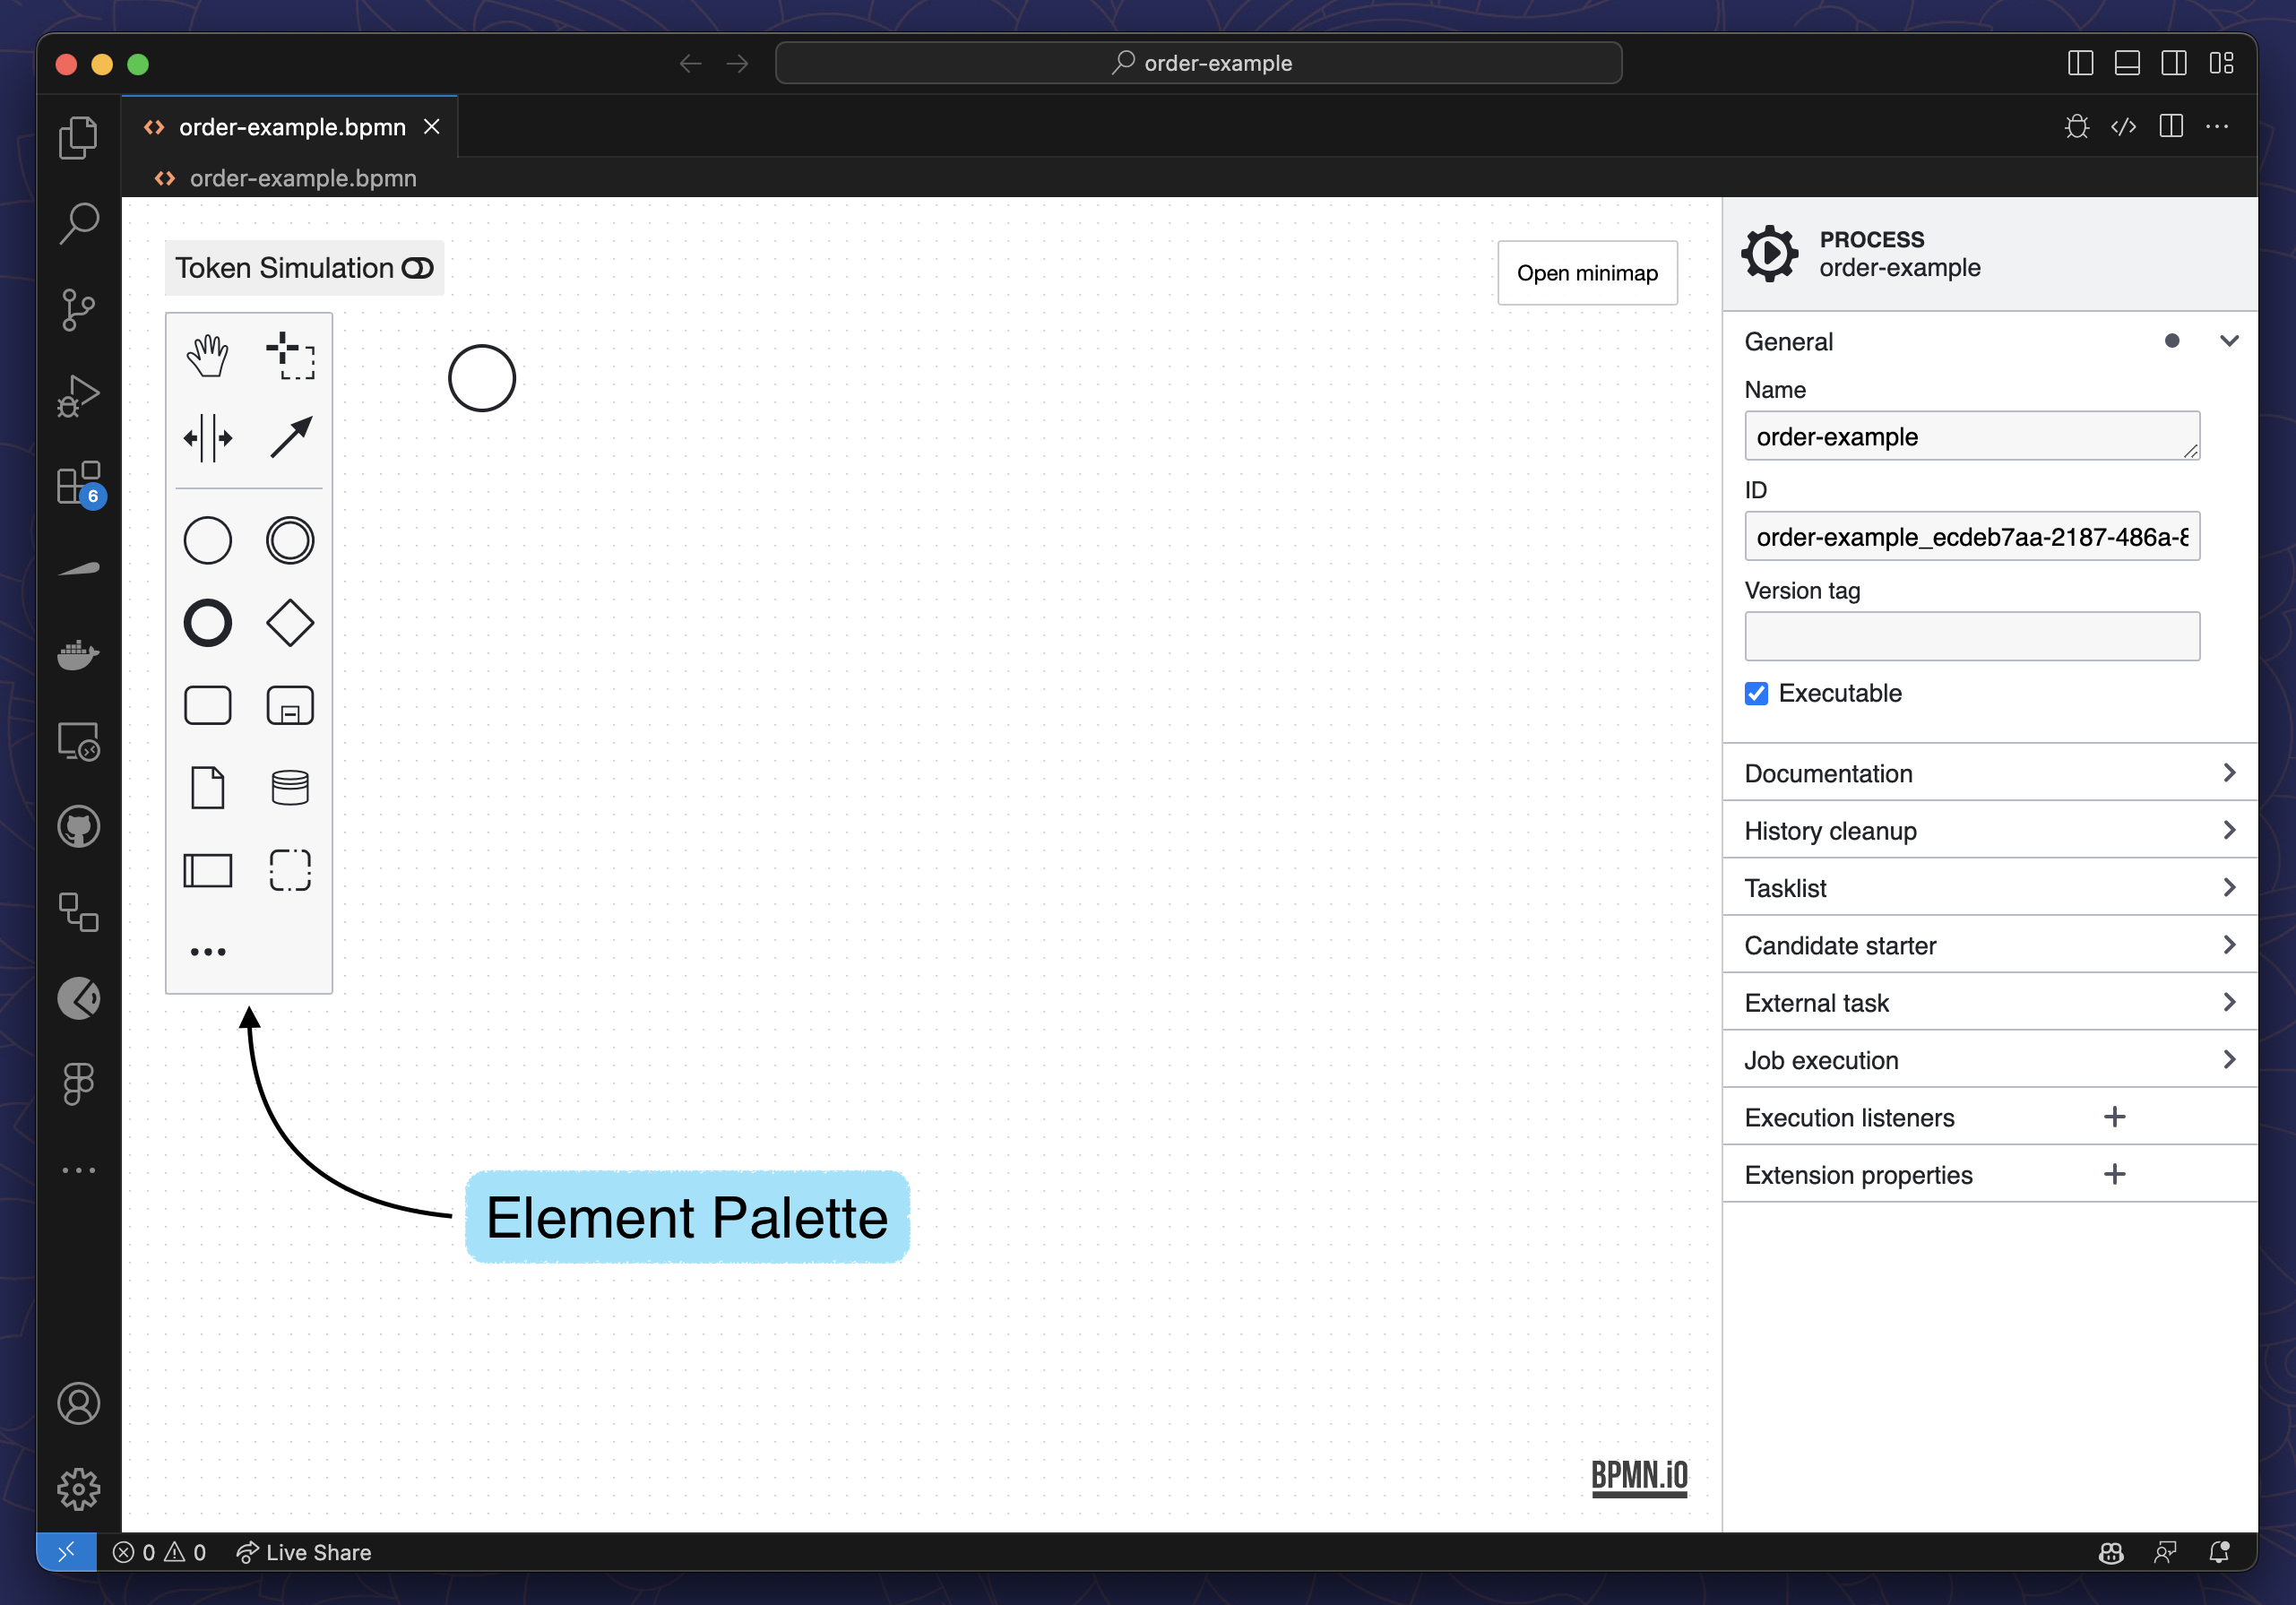
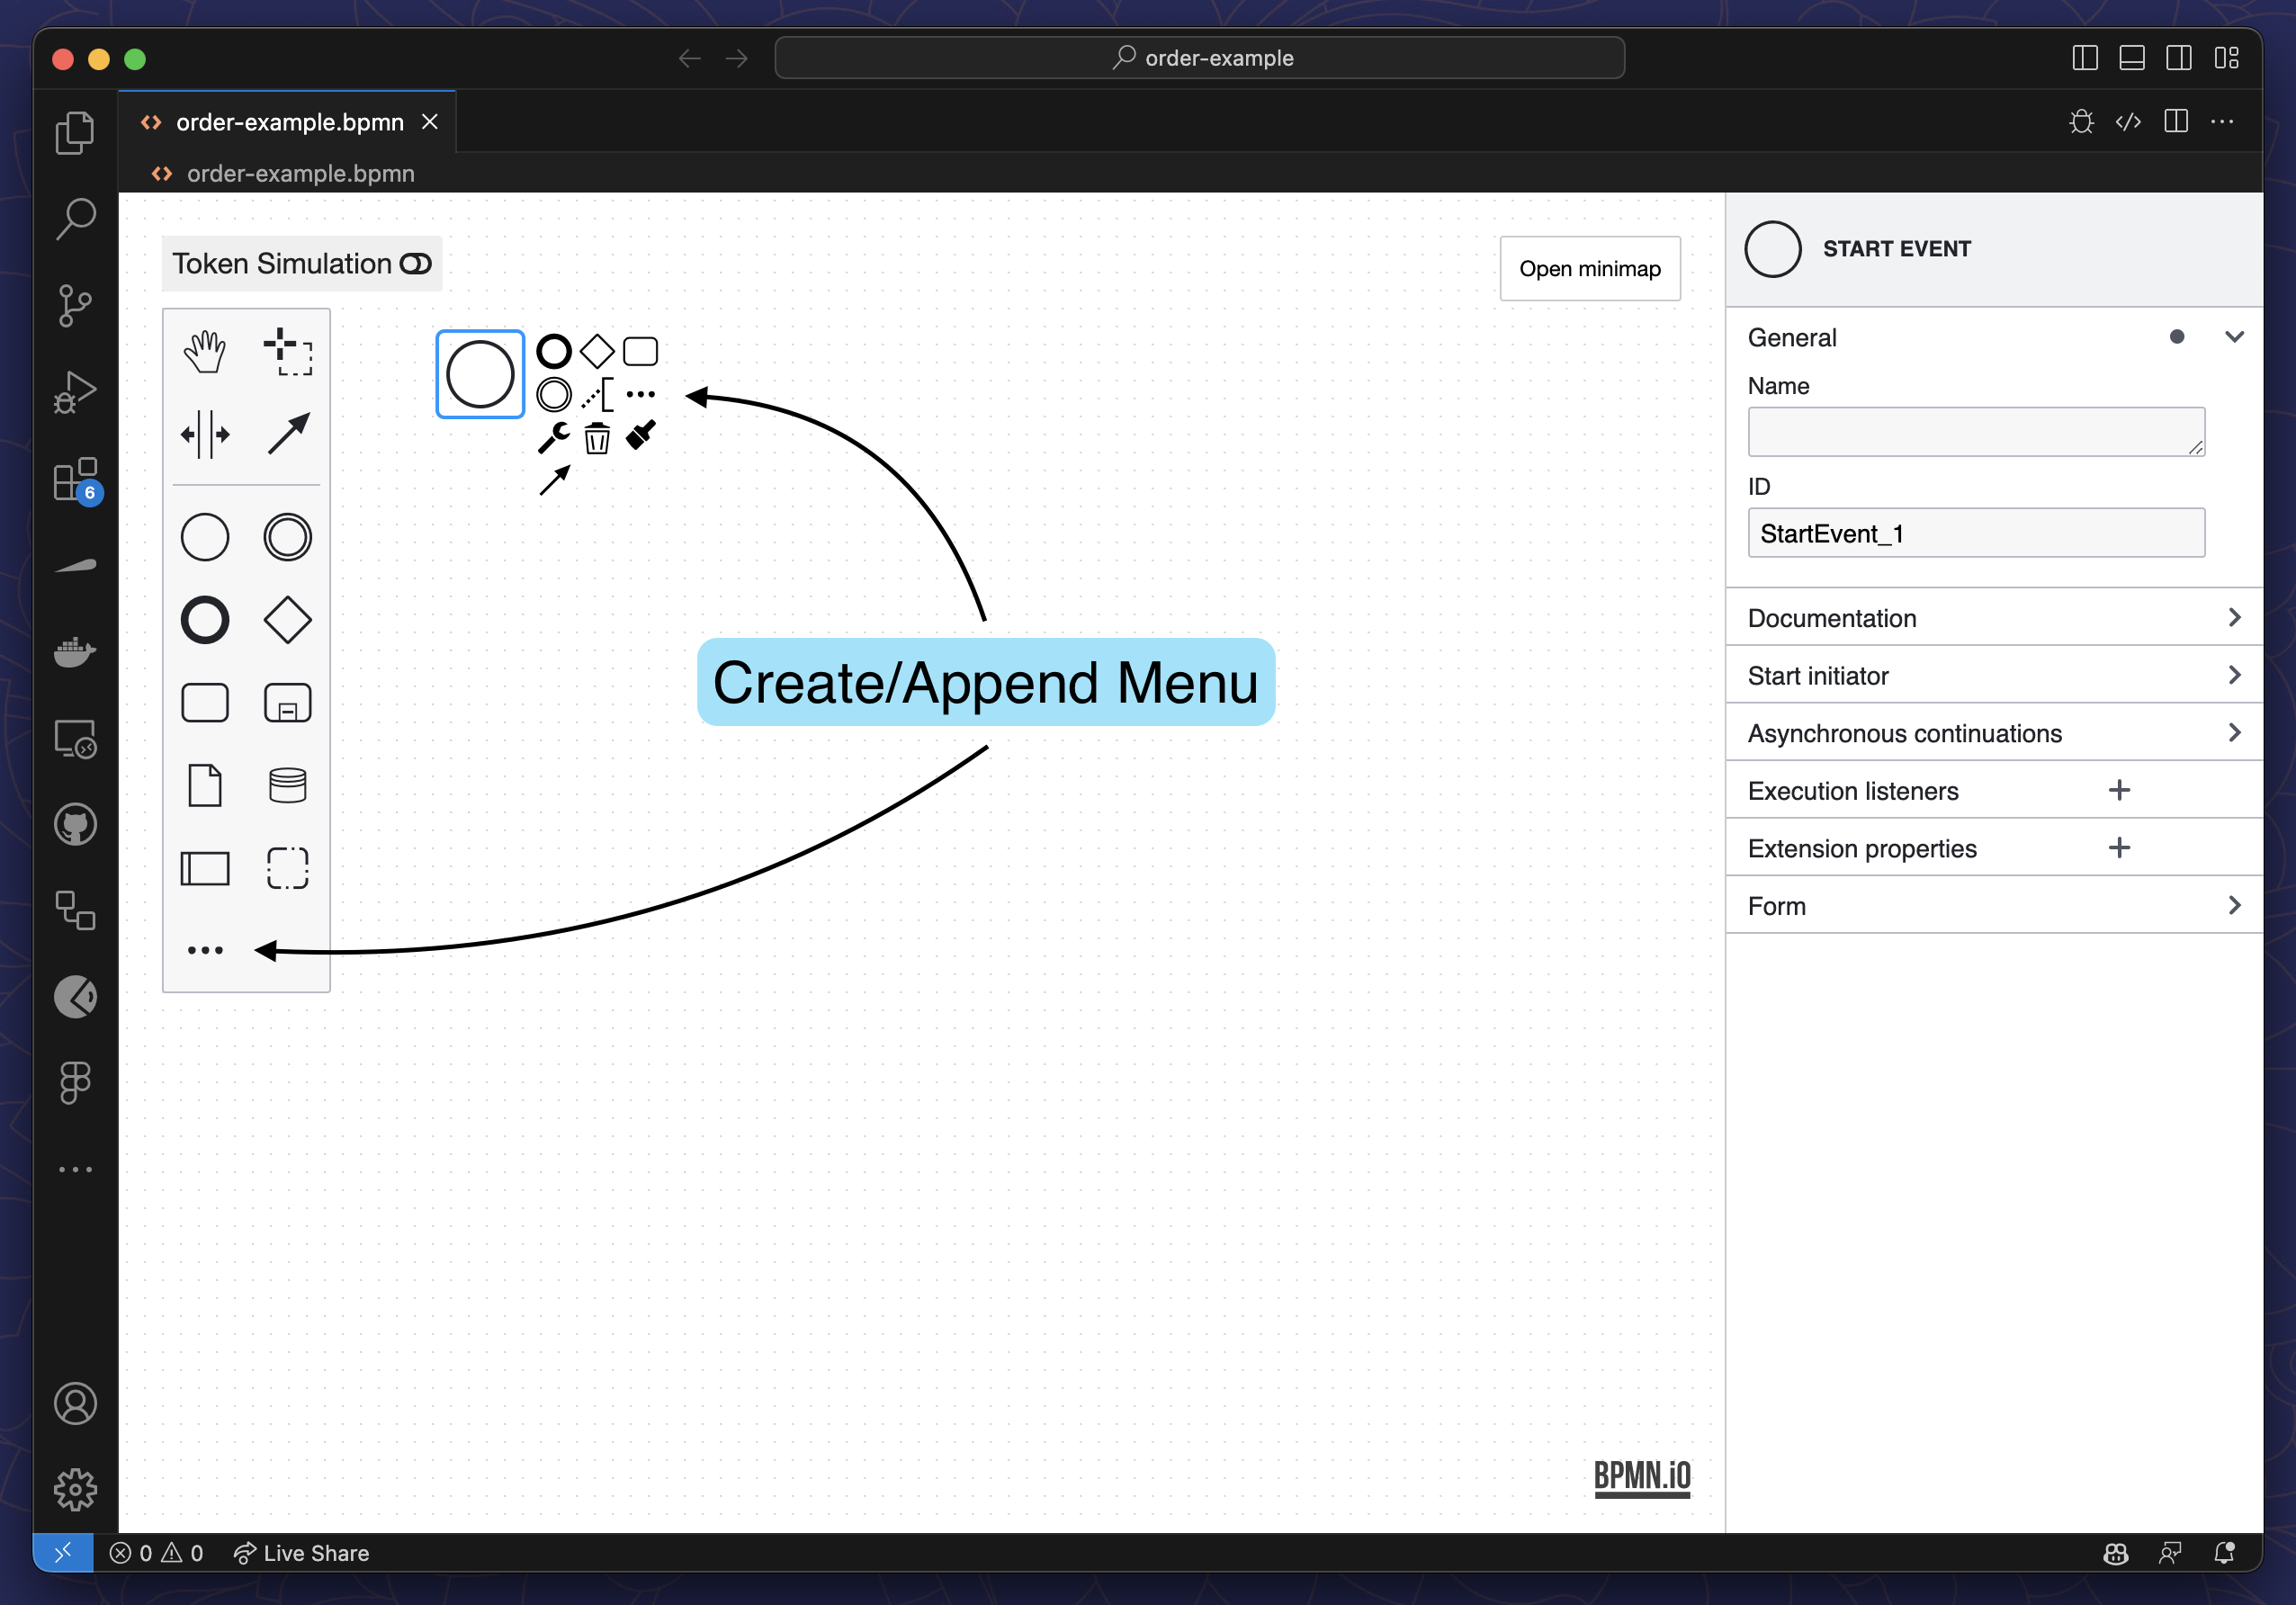
Element Palette
The Element Palette is located on the left side of the editor and contains all elements that can be used in a BPMN diagram. You can drag and drop elements from the palette into the editor to add them to your process.
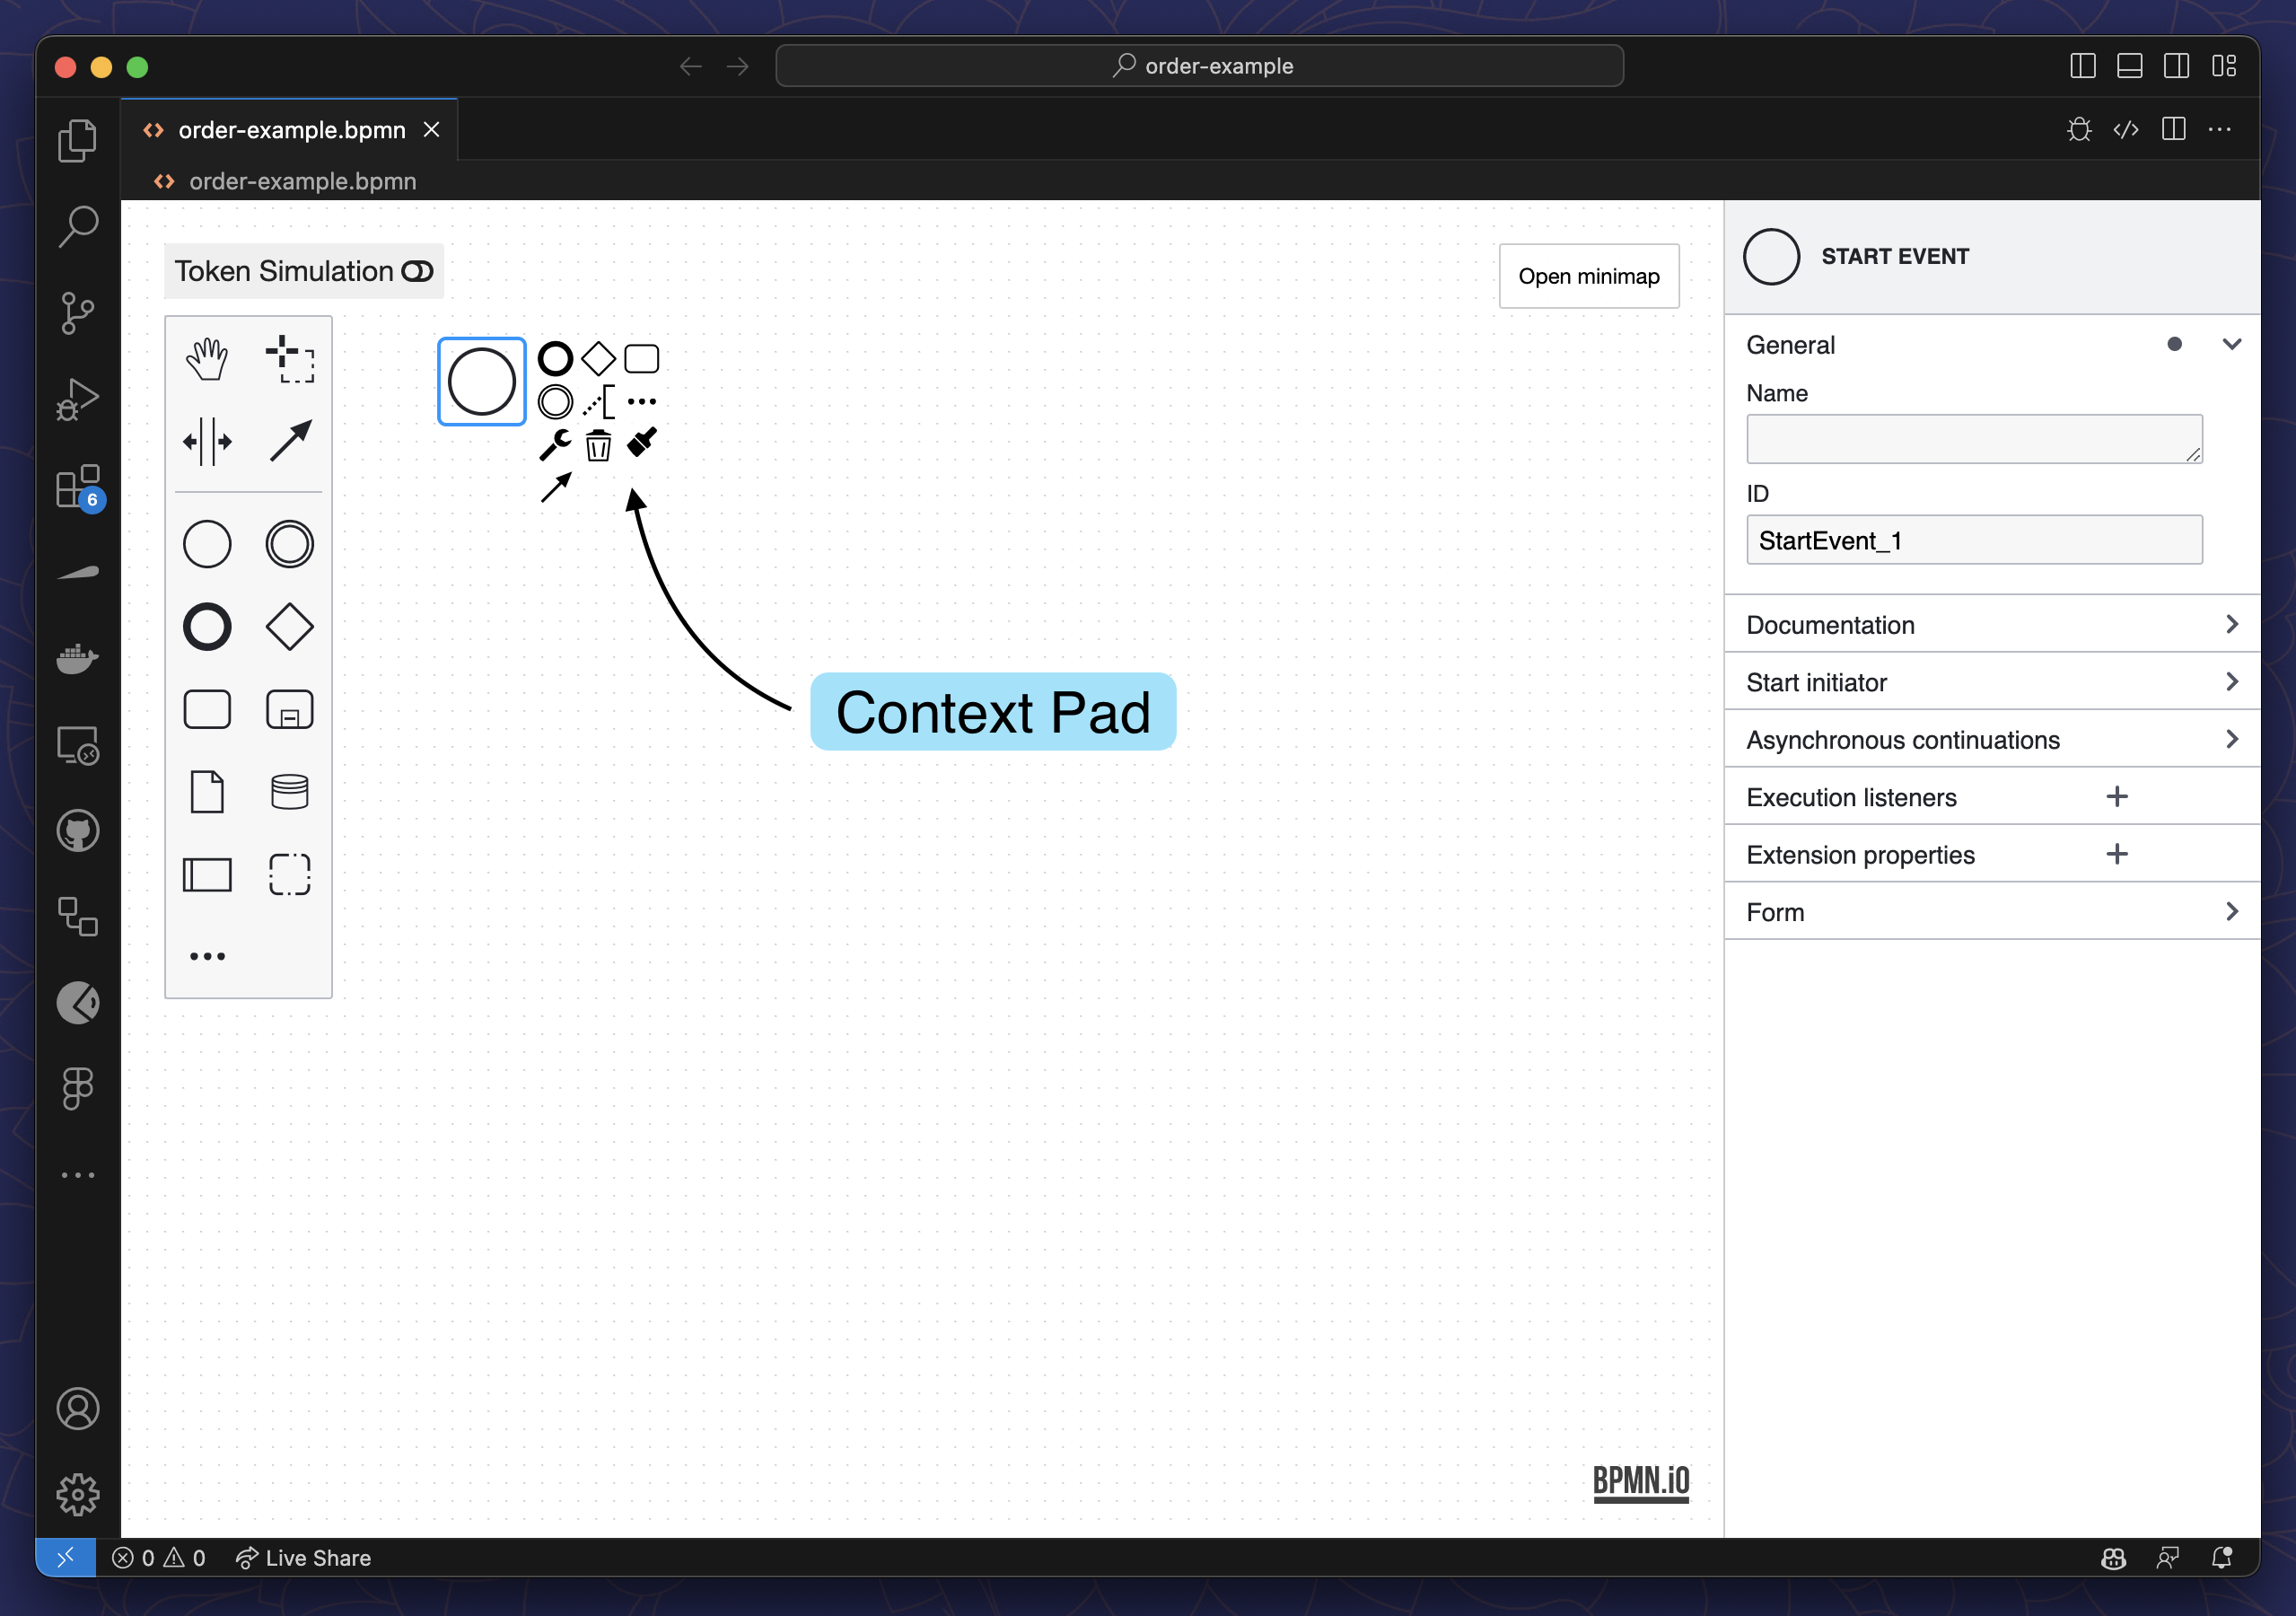
Context Pad
The Context Pad is shown when you select an element in the editor. You can use it to quickly append a BPMN element to your process or to remove/morph the selected element.
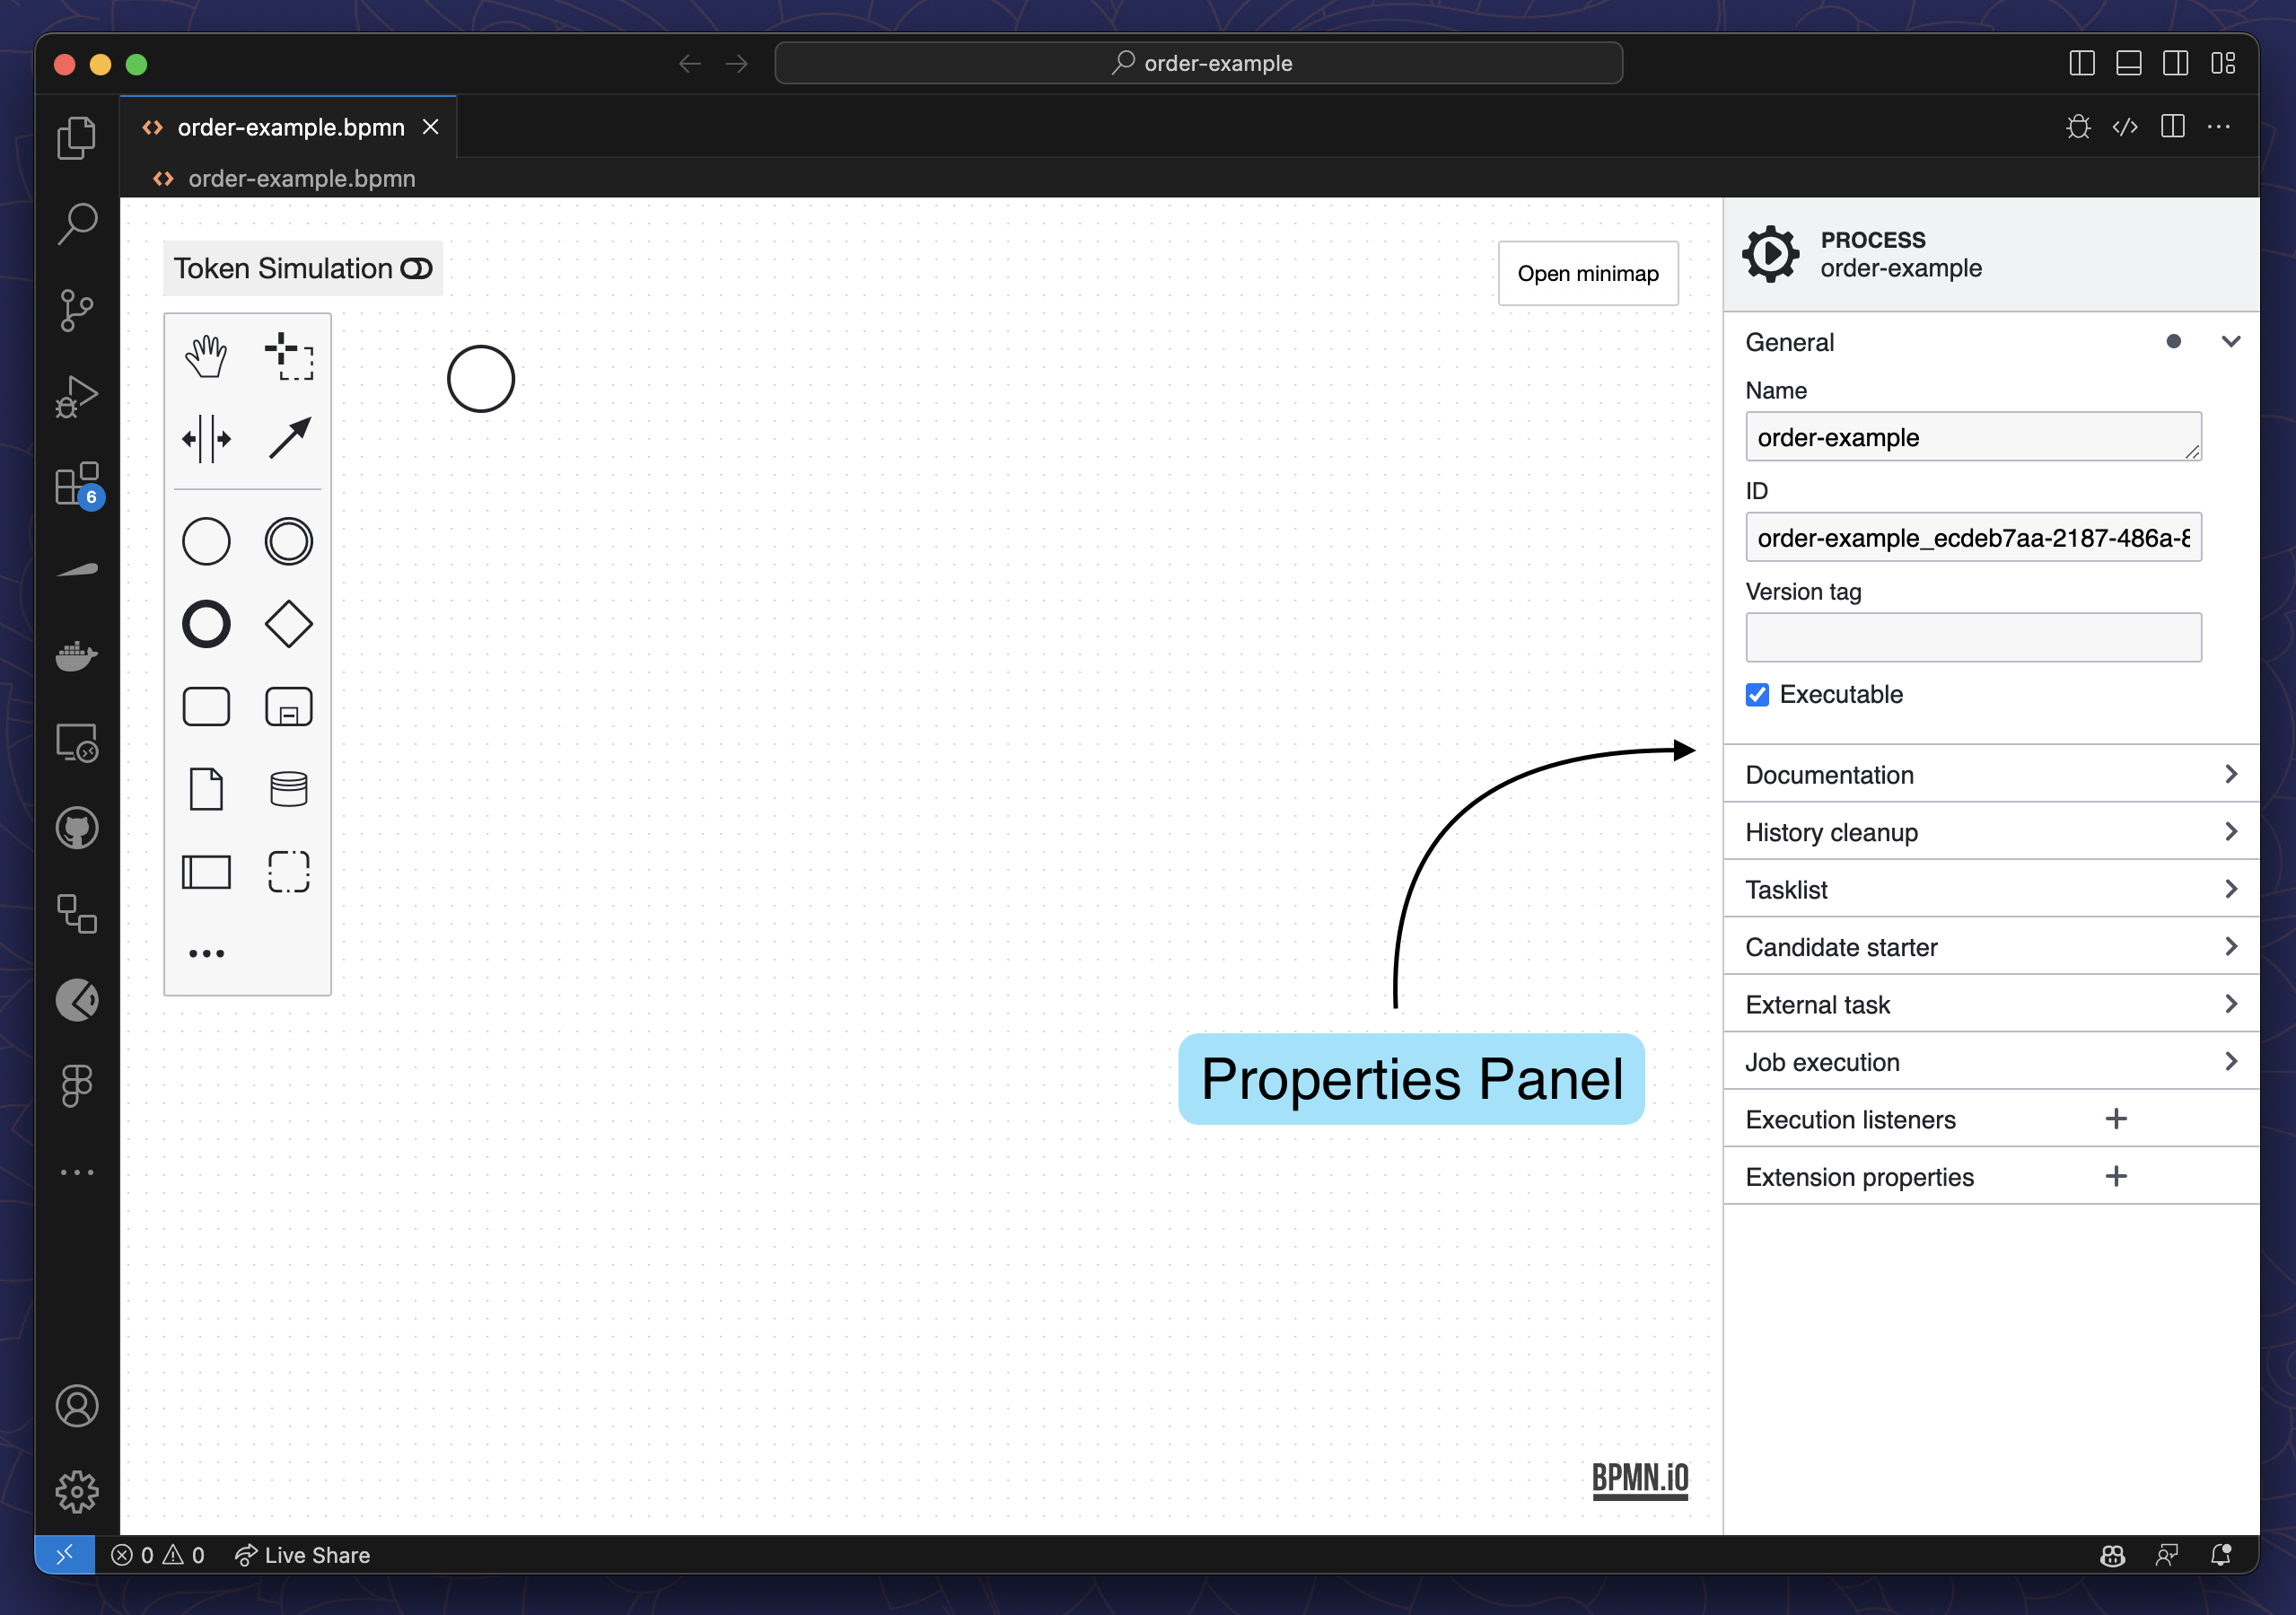
Properties Panel
The Properties Panel is located on the right side of the editor and shows the properties of the selected element. You can use it to configure the element, like defining the input and output variables.
Create/Append Menu
Instead of dragging and dropping elements from the Element Palette, you can also use the Create/Append Menu.
Normally you would drag and drop the element and then use the Wrench Button in the Context Pad to morph it
to a specific type.
For example, you can drag and drop a Task and then morph it to a User Task.
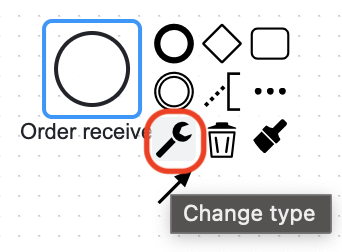
With the Create/Append Menu you can directly create a User Task without the need to morph it.
With this in mind, let's create our first process.
Create a Process
The Miranum Modeler can be used to model BPMN diagrams for Camunda 7 and Camunda 8.
If you create an empty .bpmn file manually, the Modeler will automatically create a diagram for Camunda 7
and use the respective namespace.
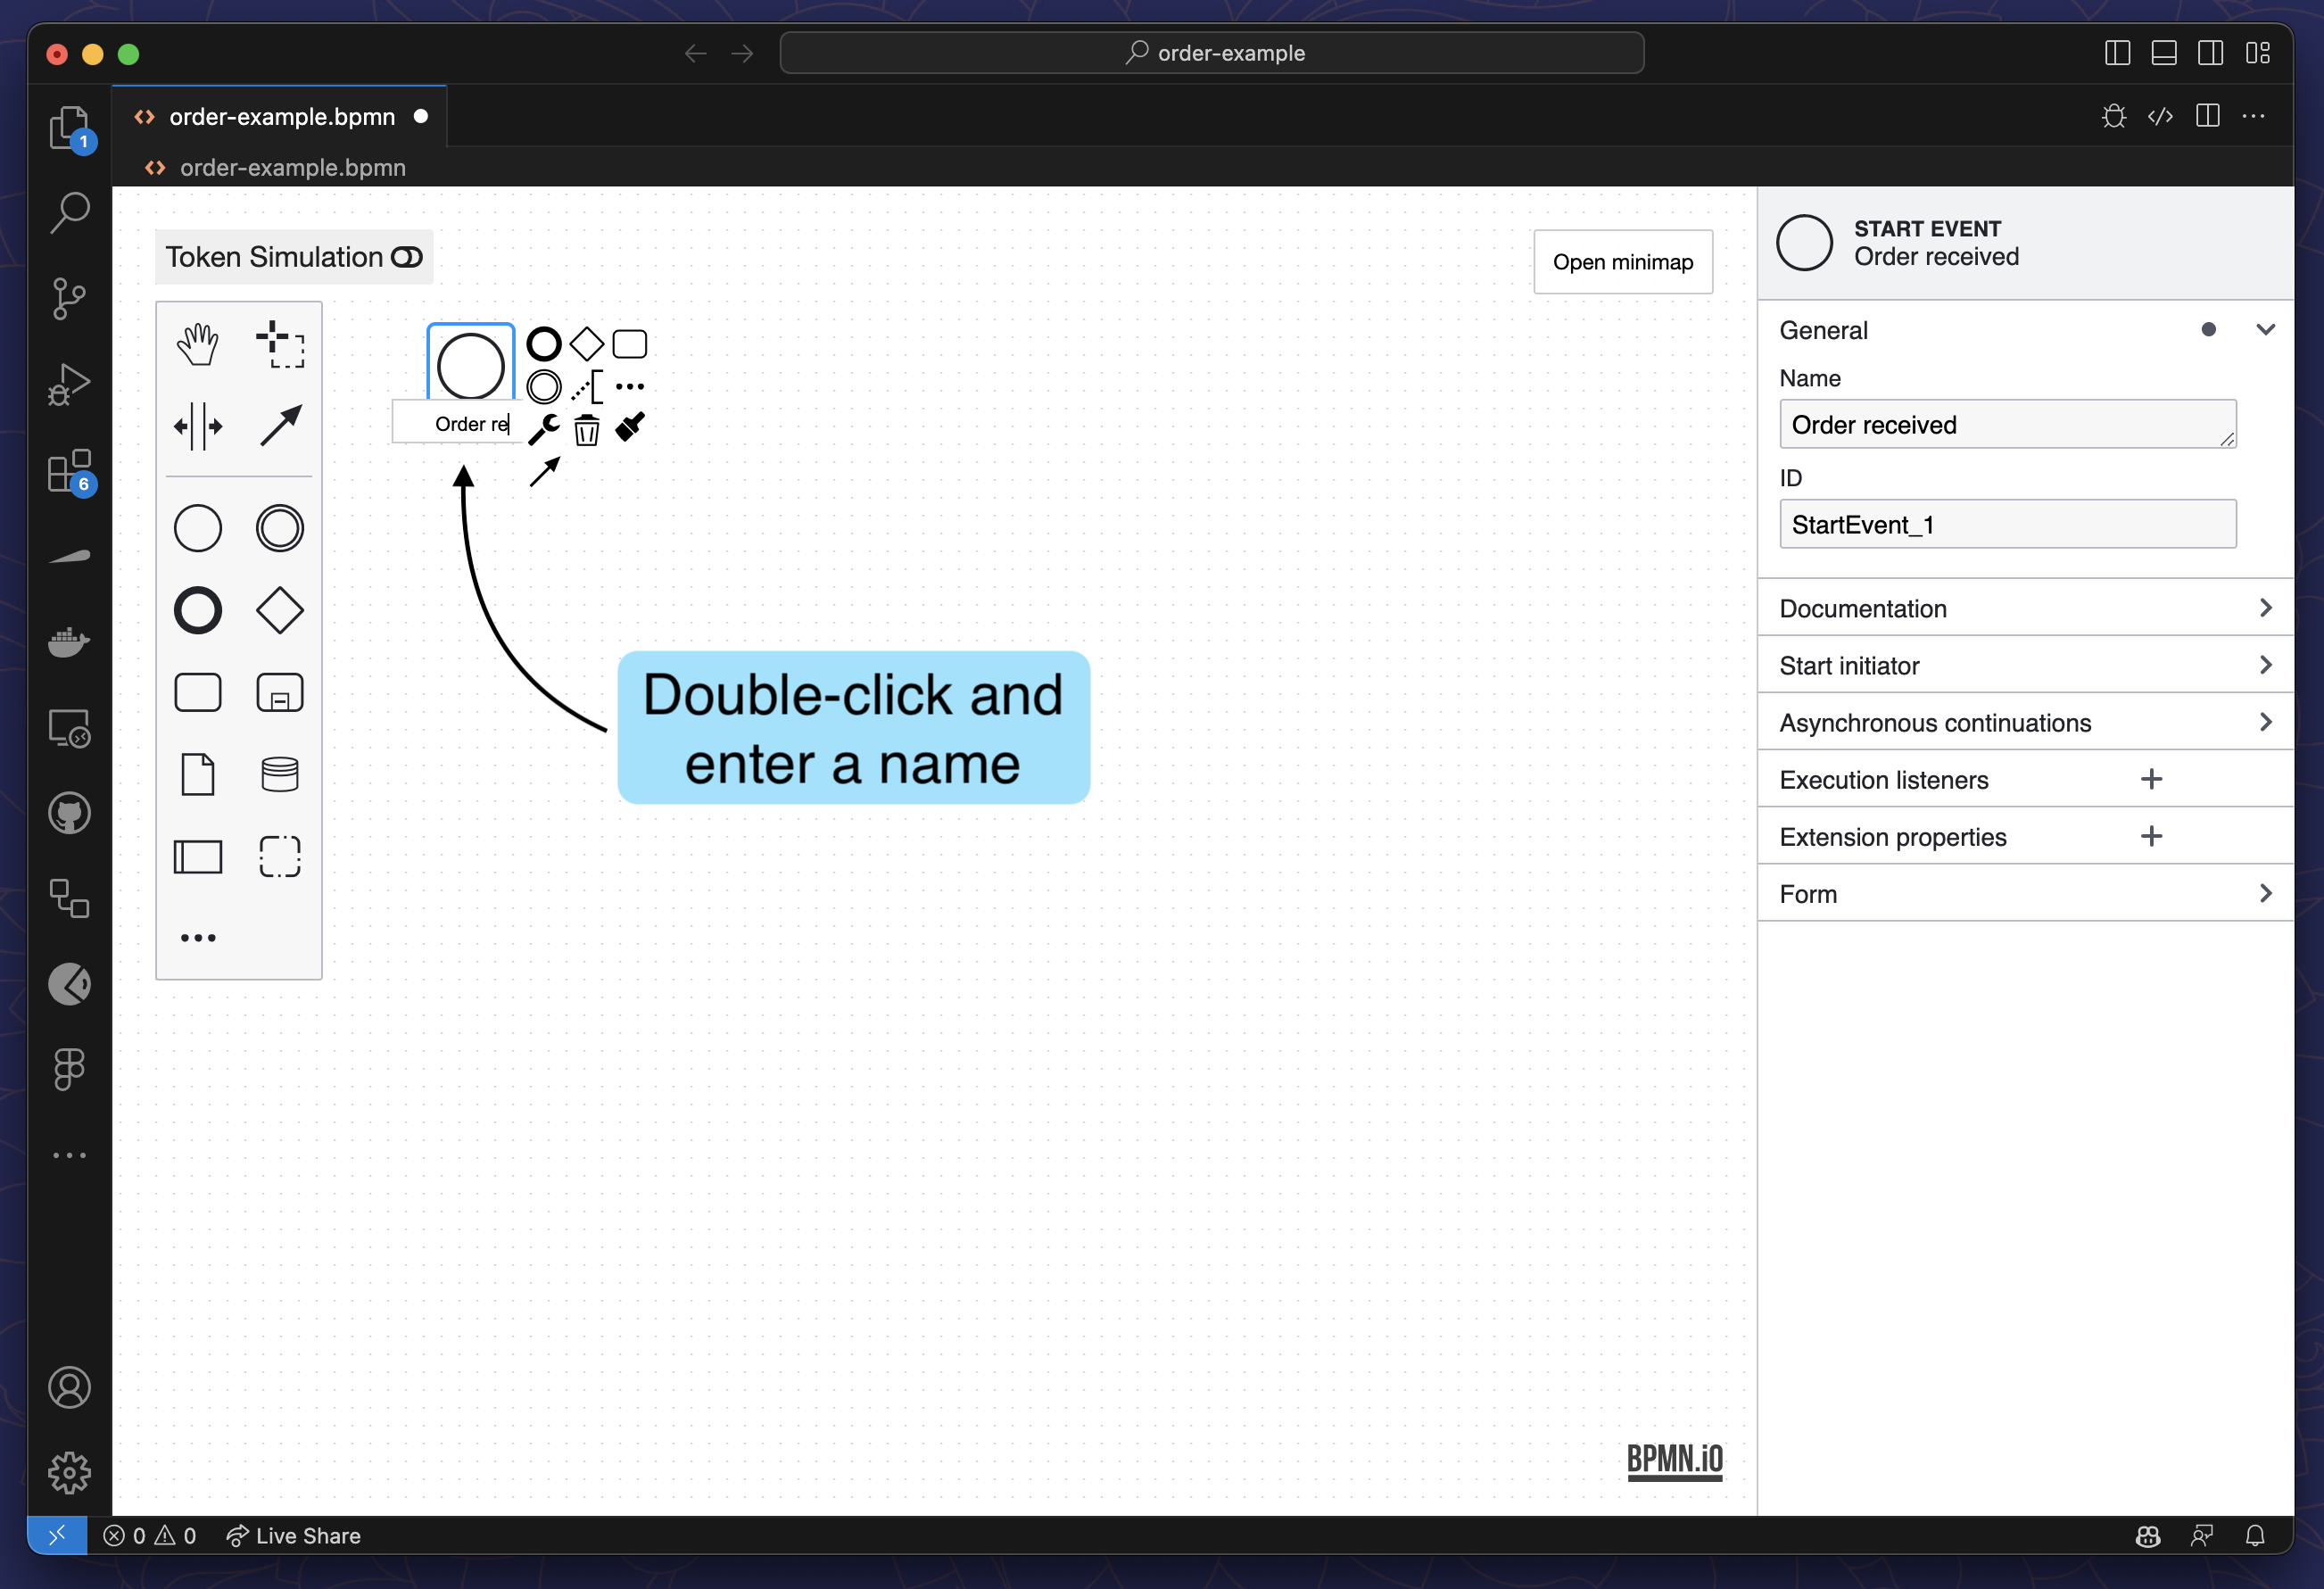
The generated .bpmn file already contains a Start Event.
Double-click on it and enter a name
Select the Start Event and click on the
Append Menubutton in the Context Pad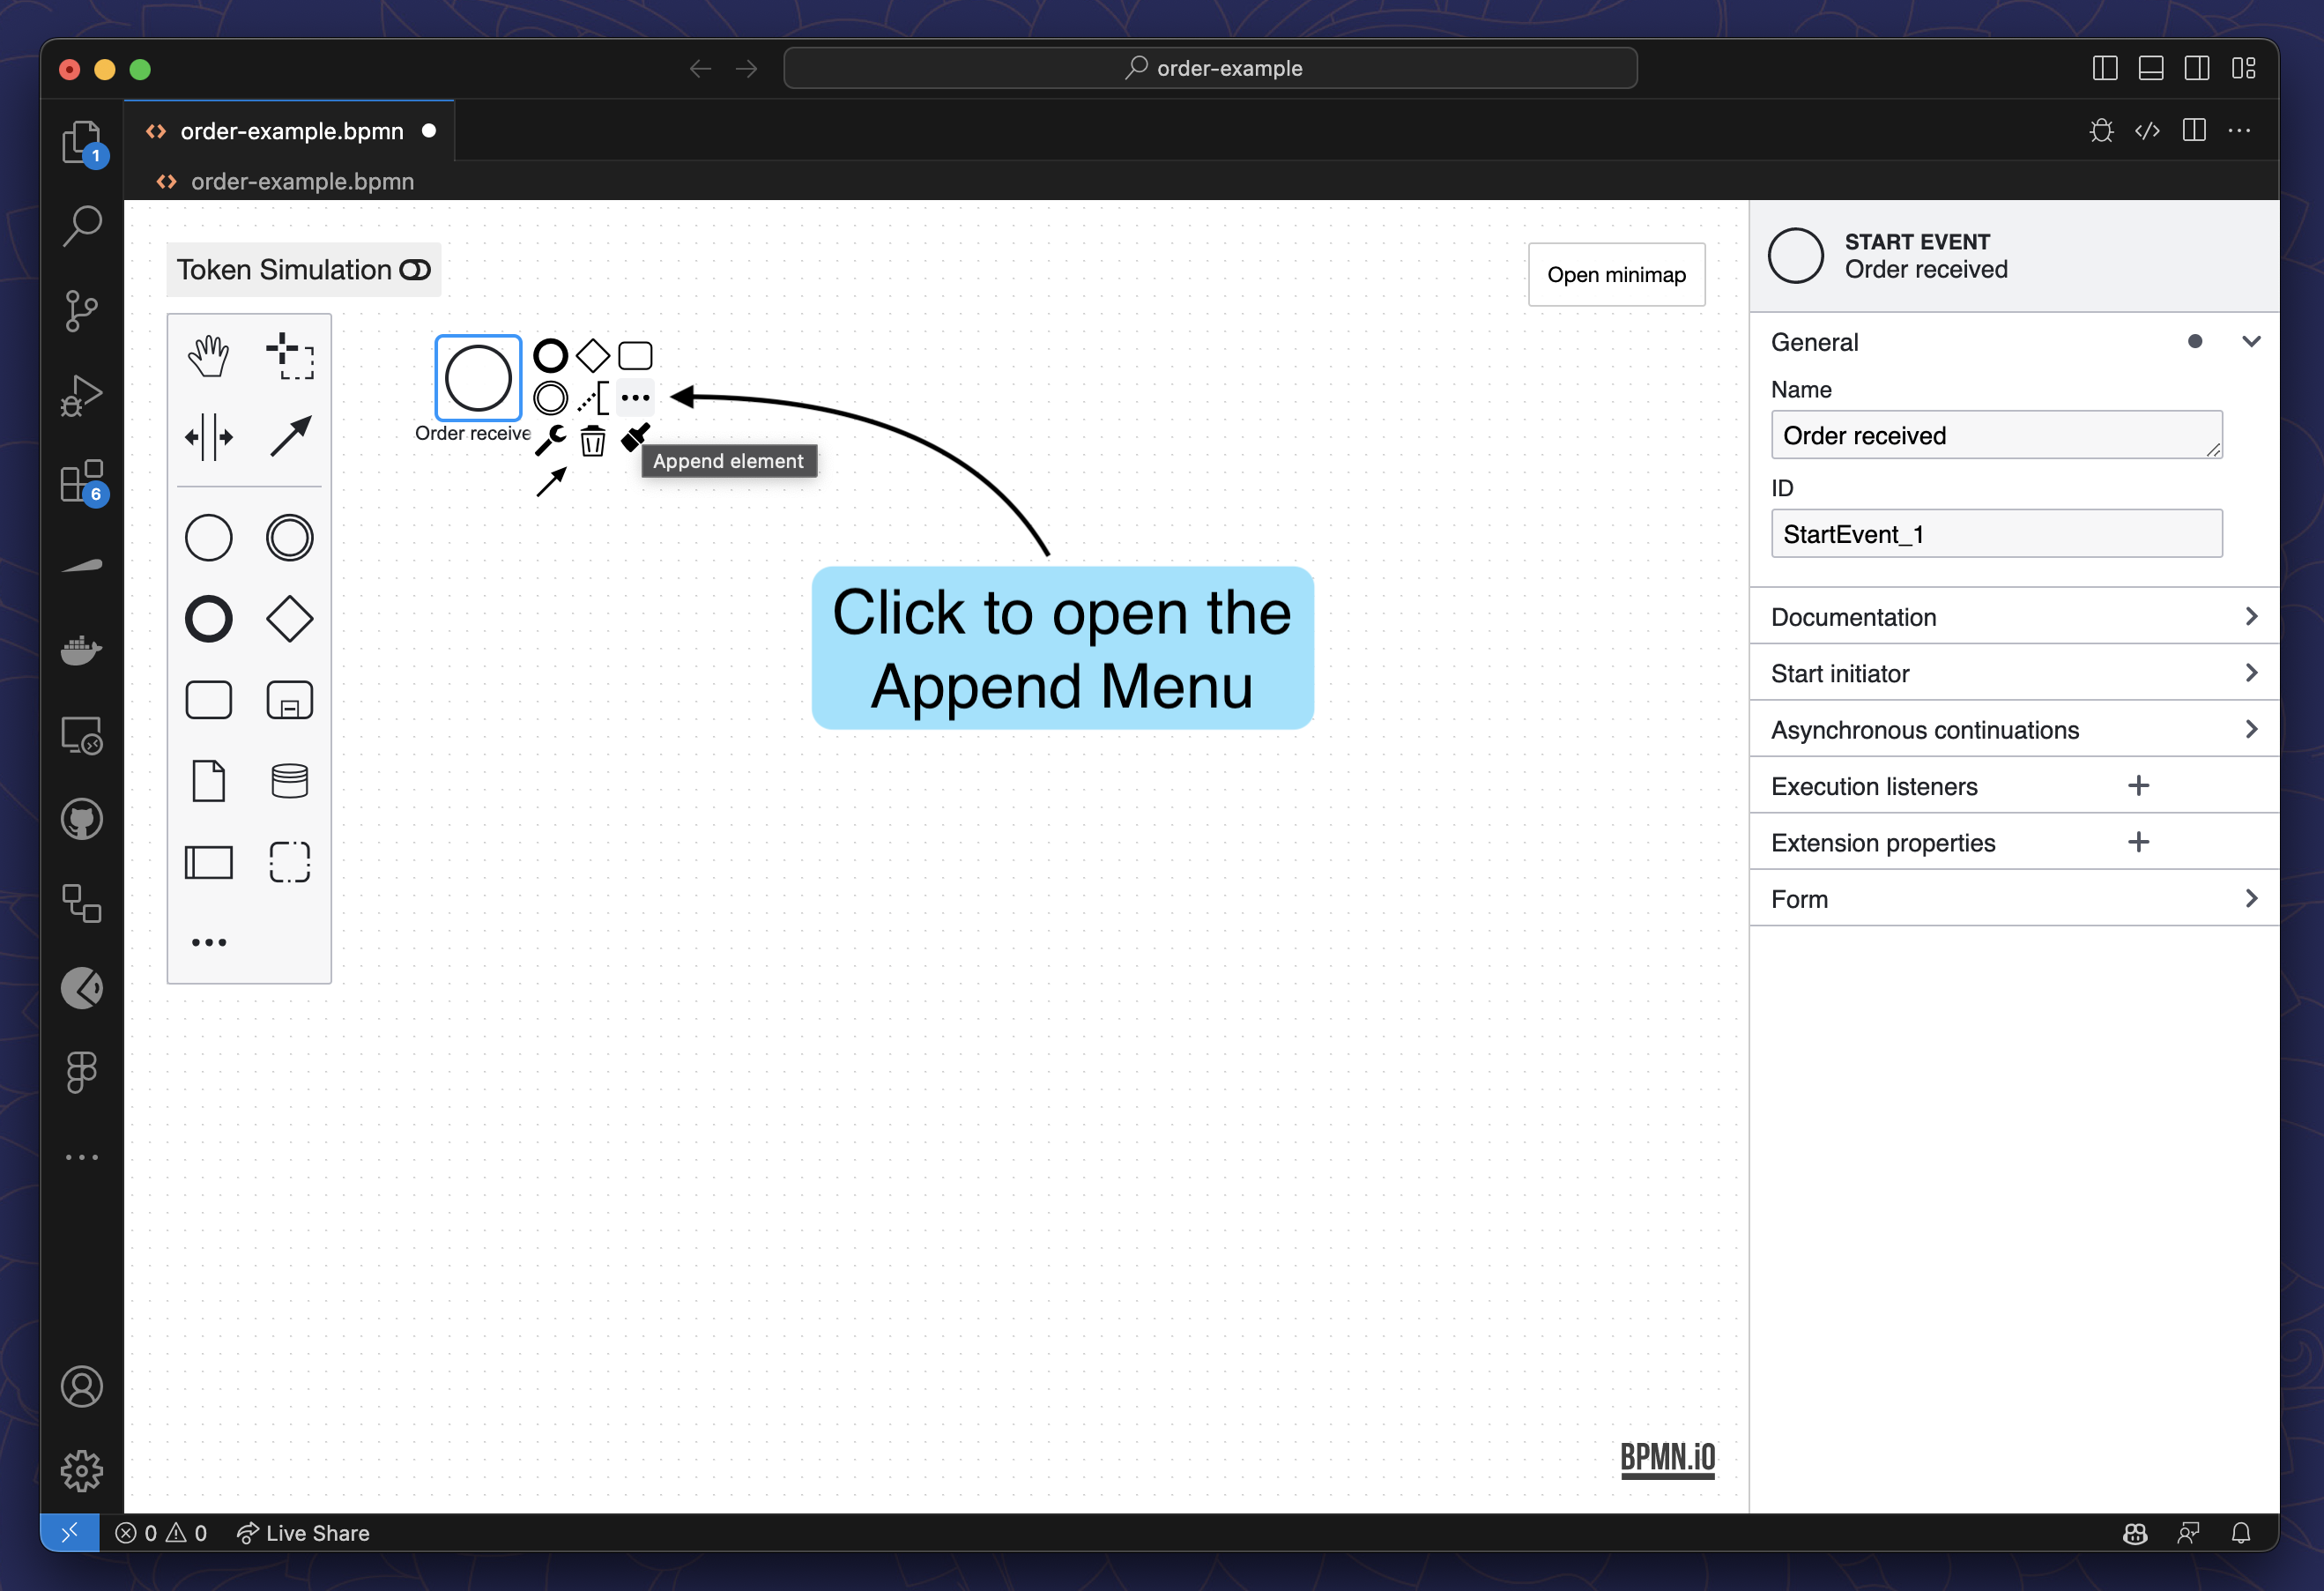
Search for
User Taskand click on it to append it to the process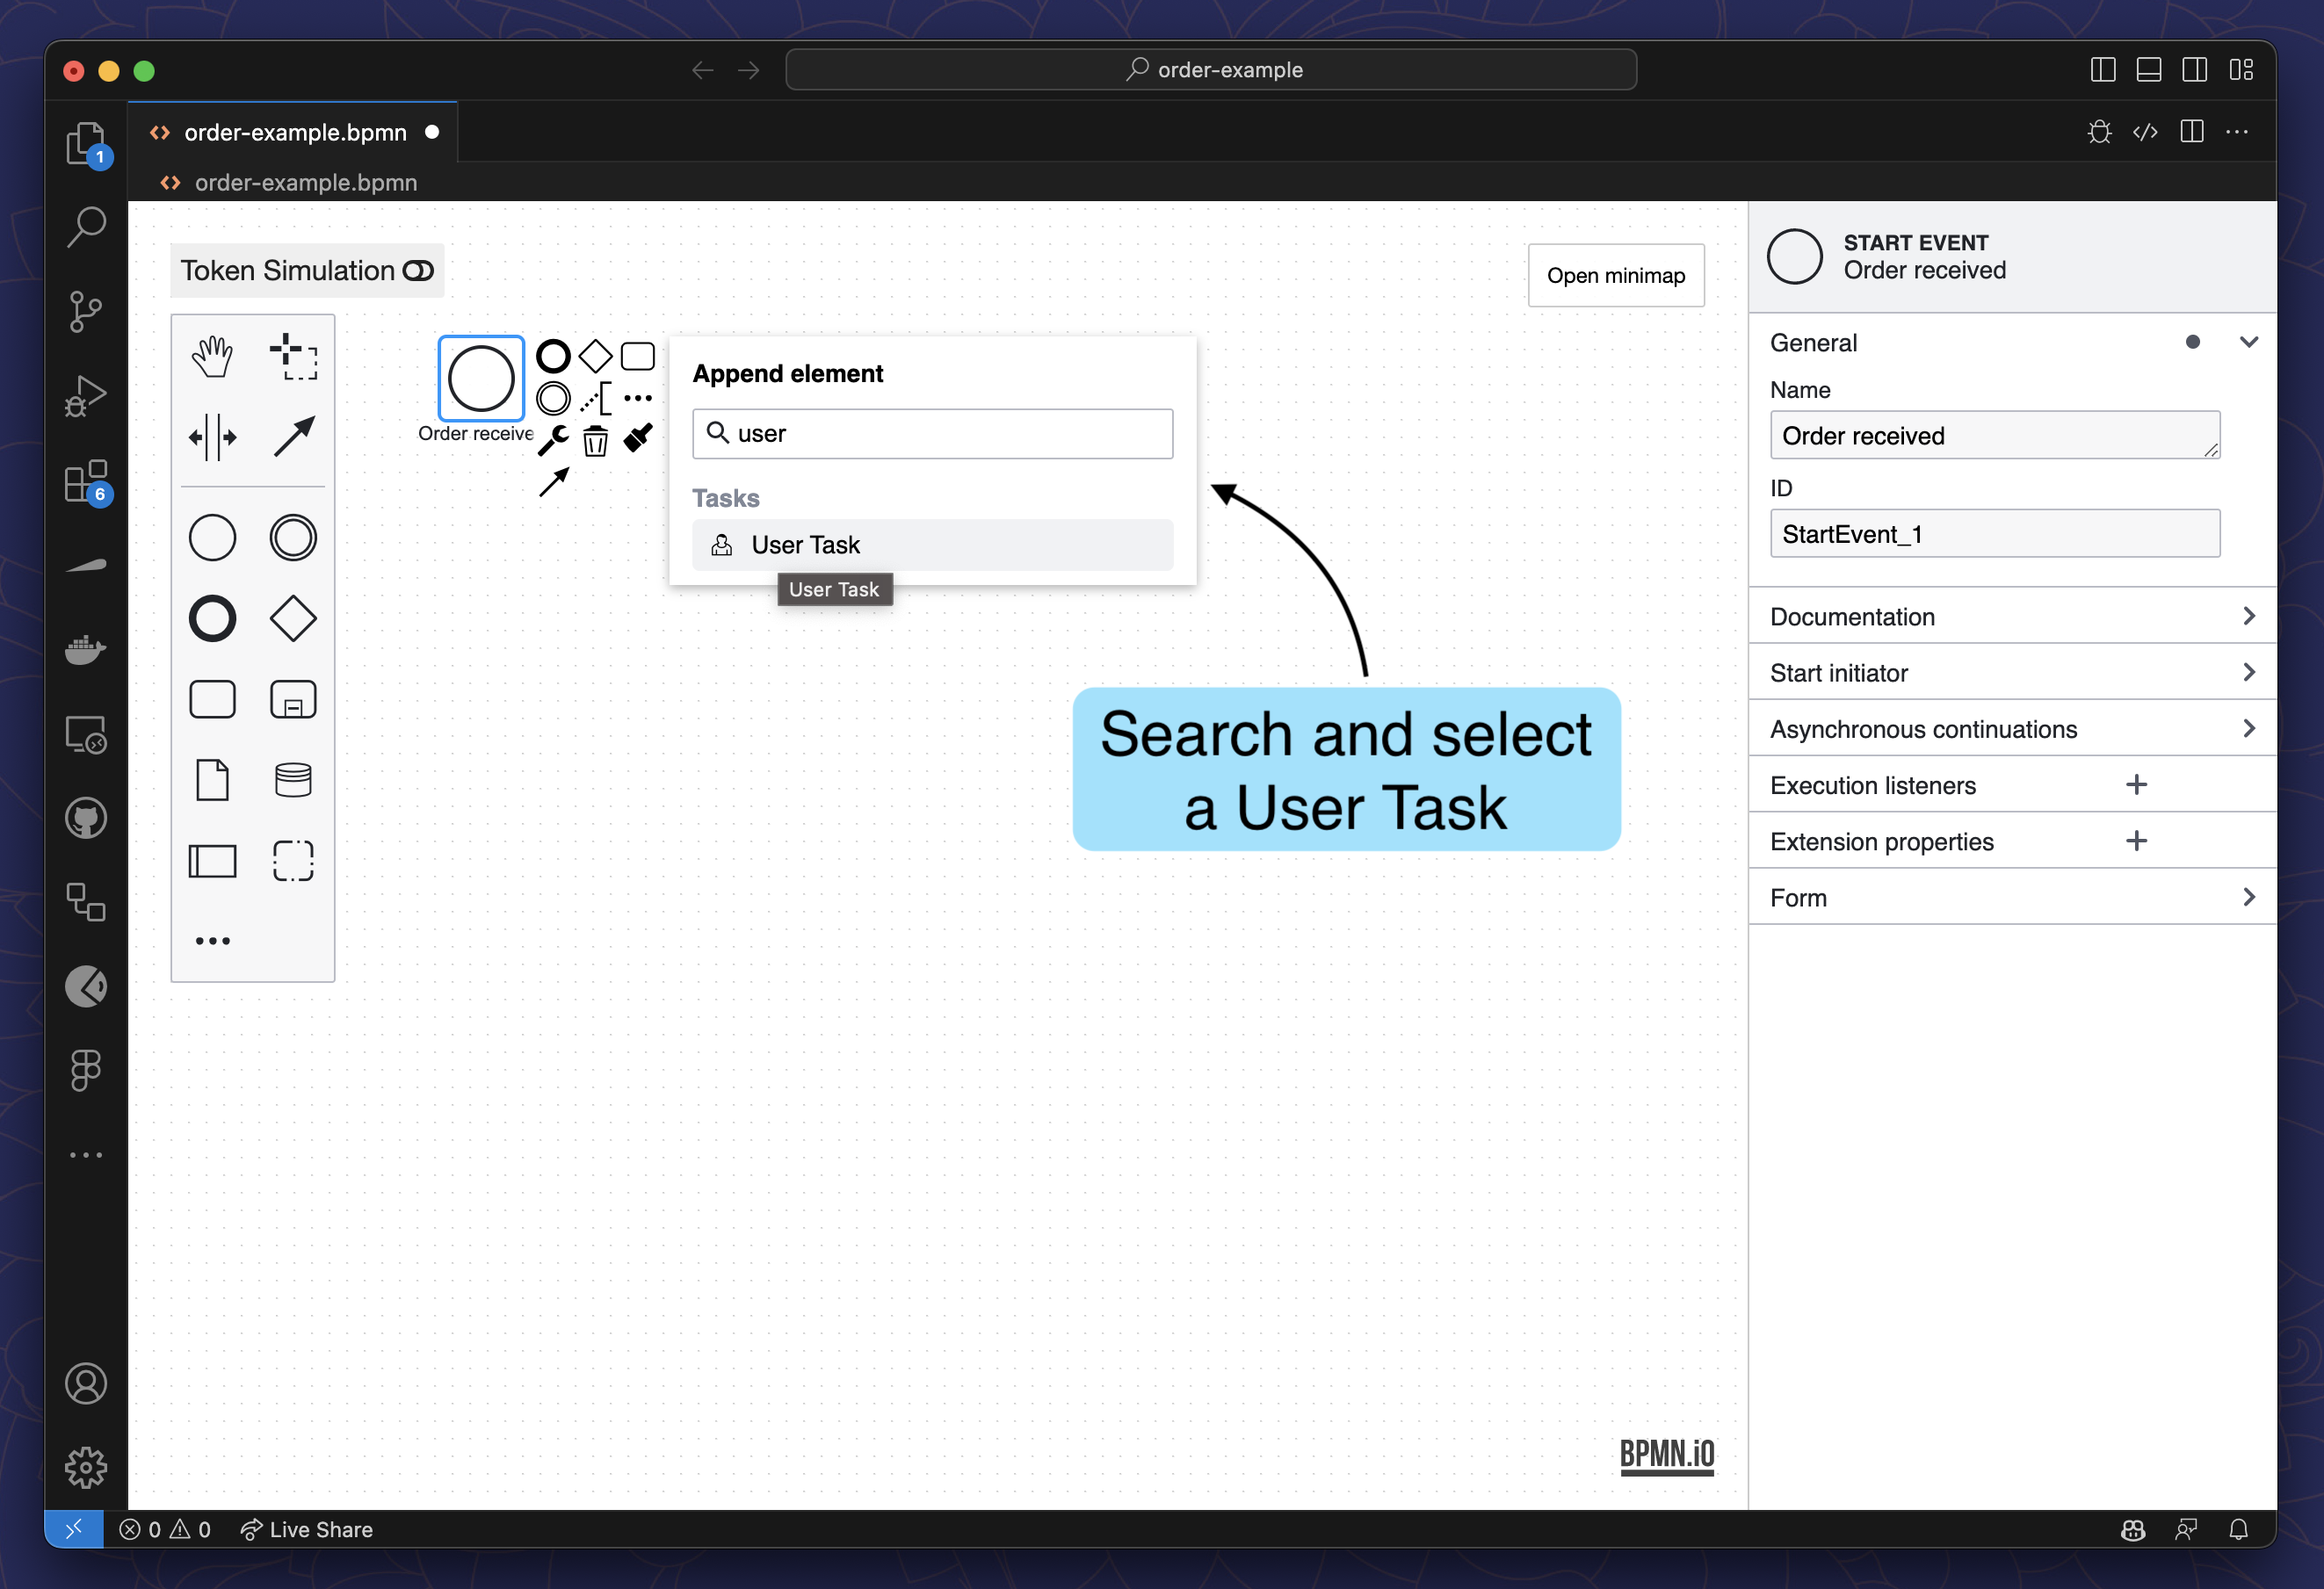
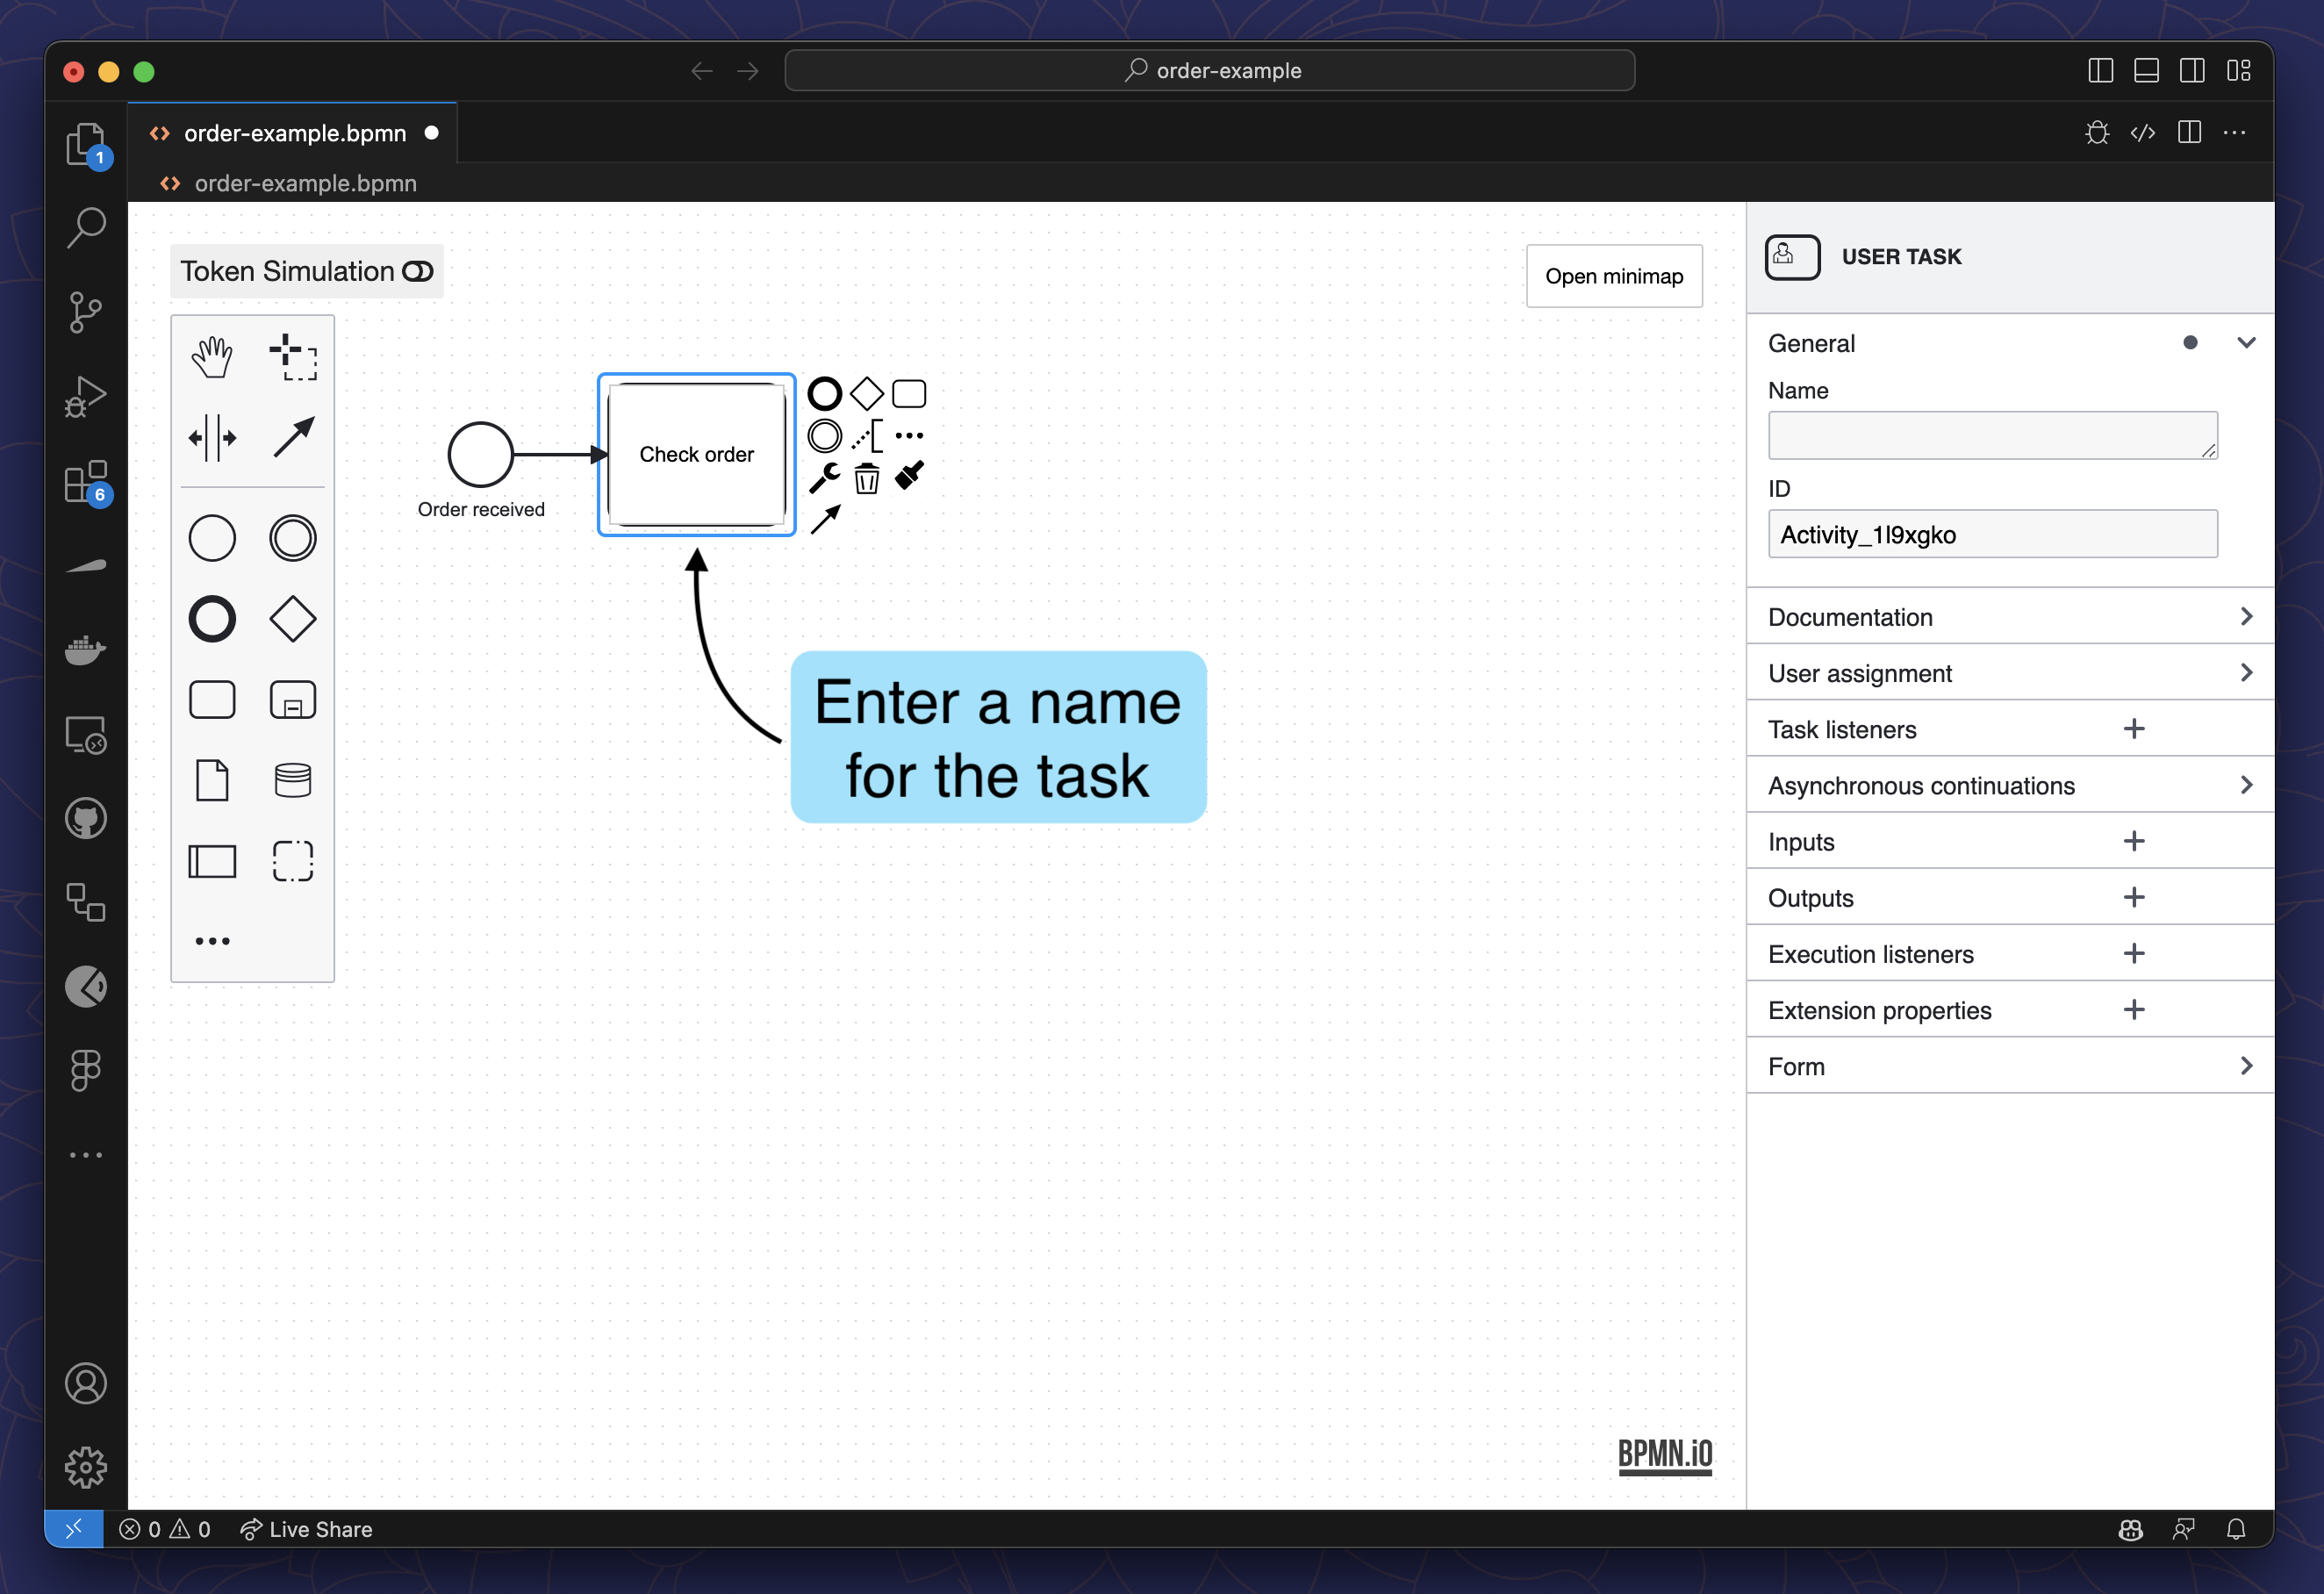
Enter a name for the task
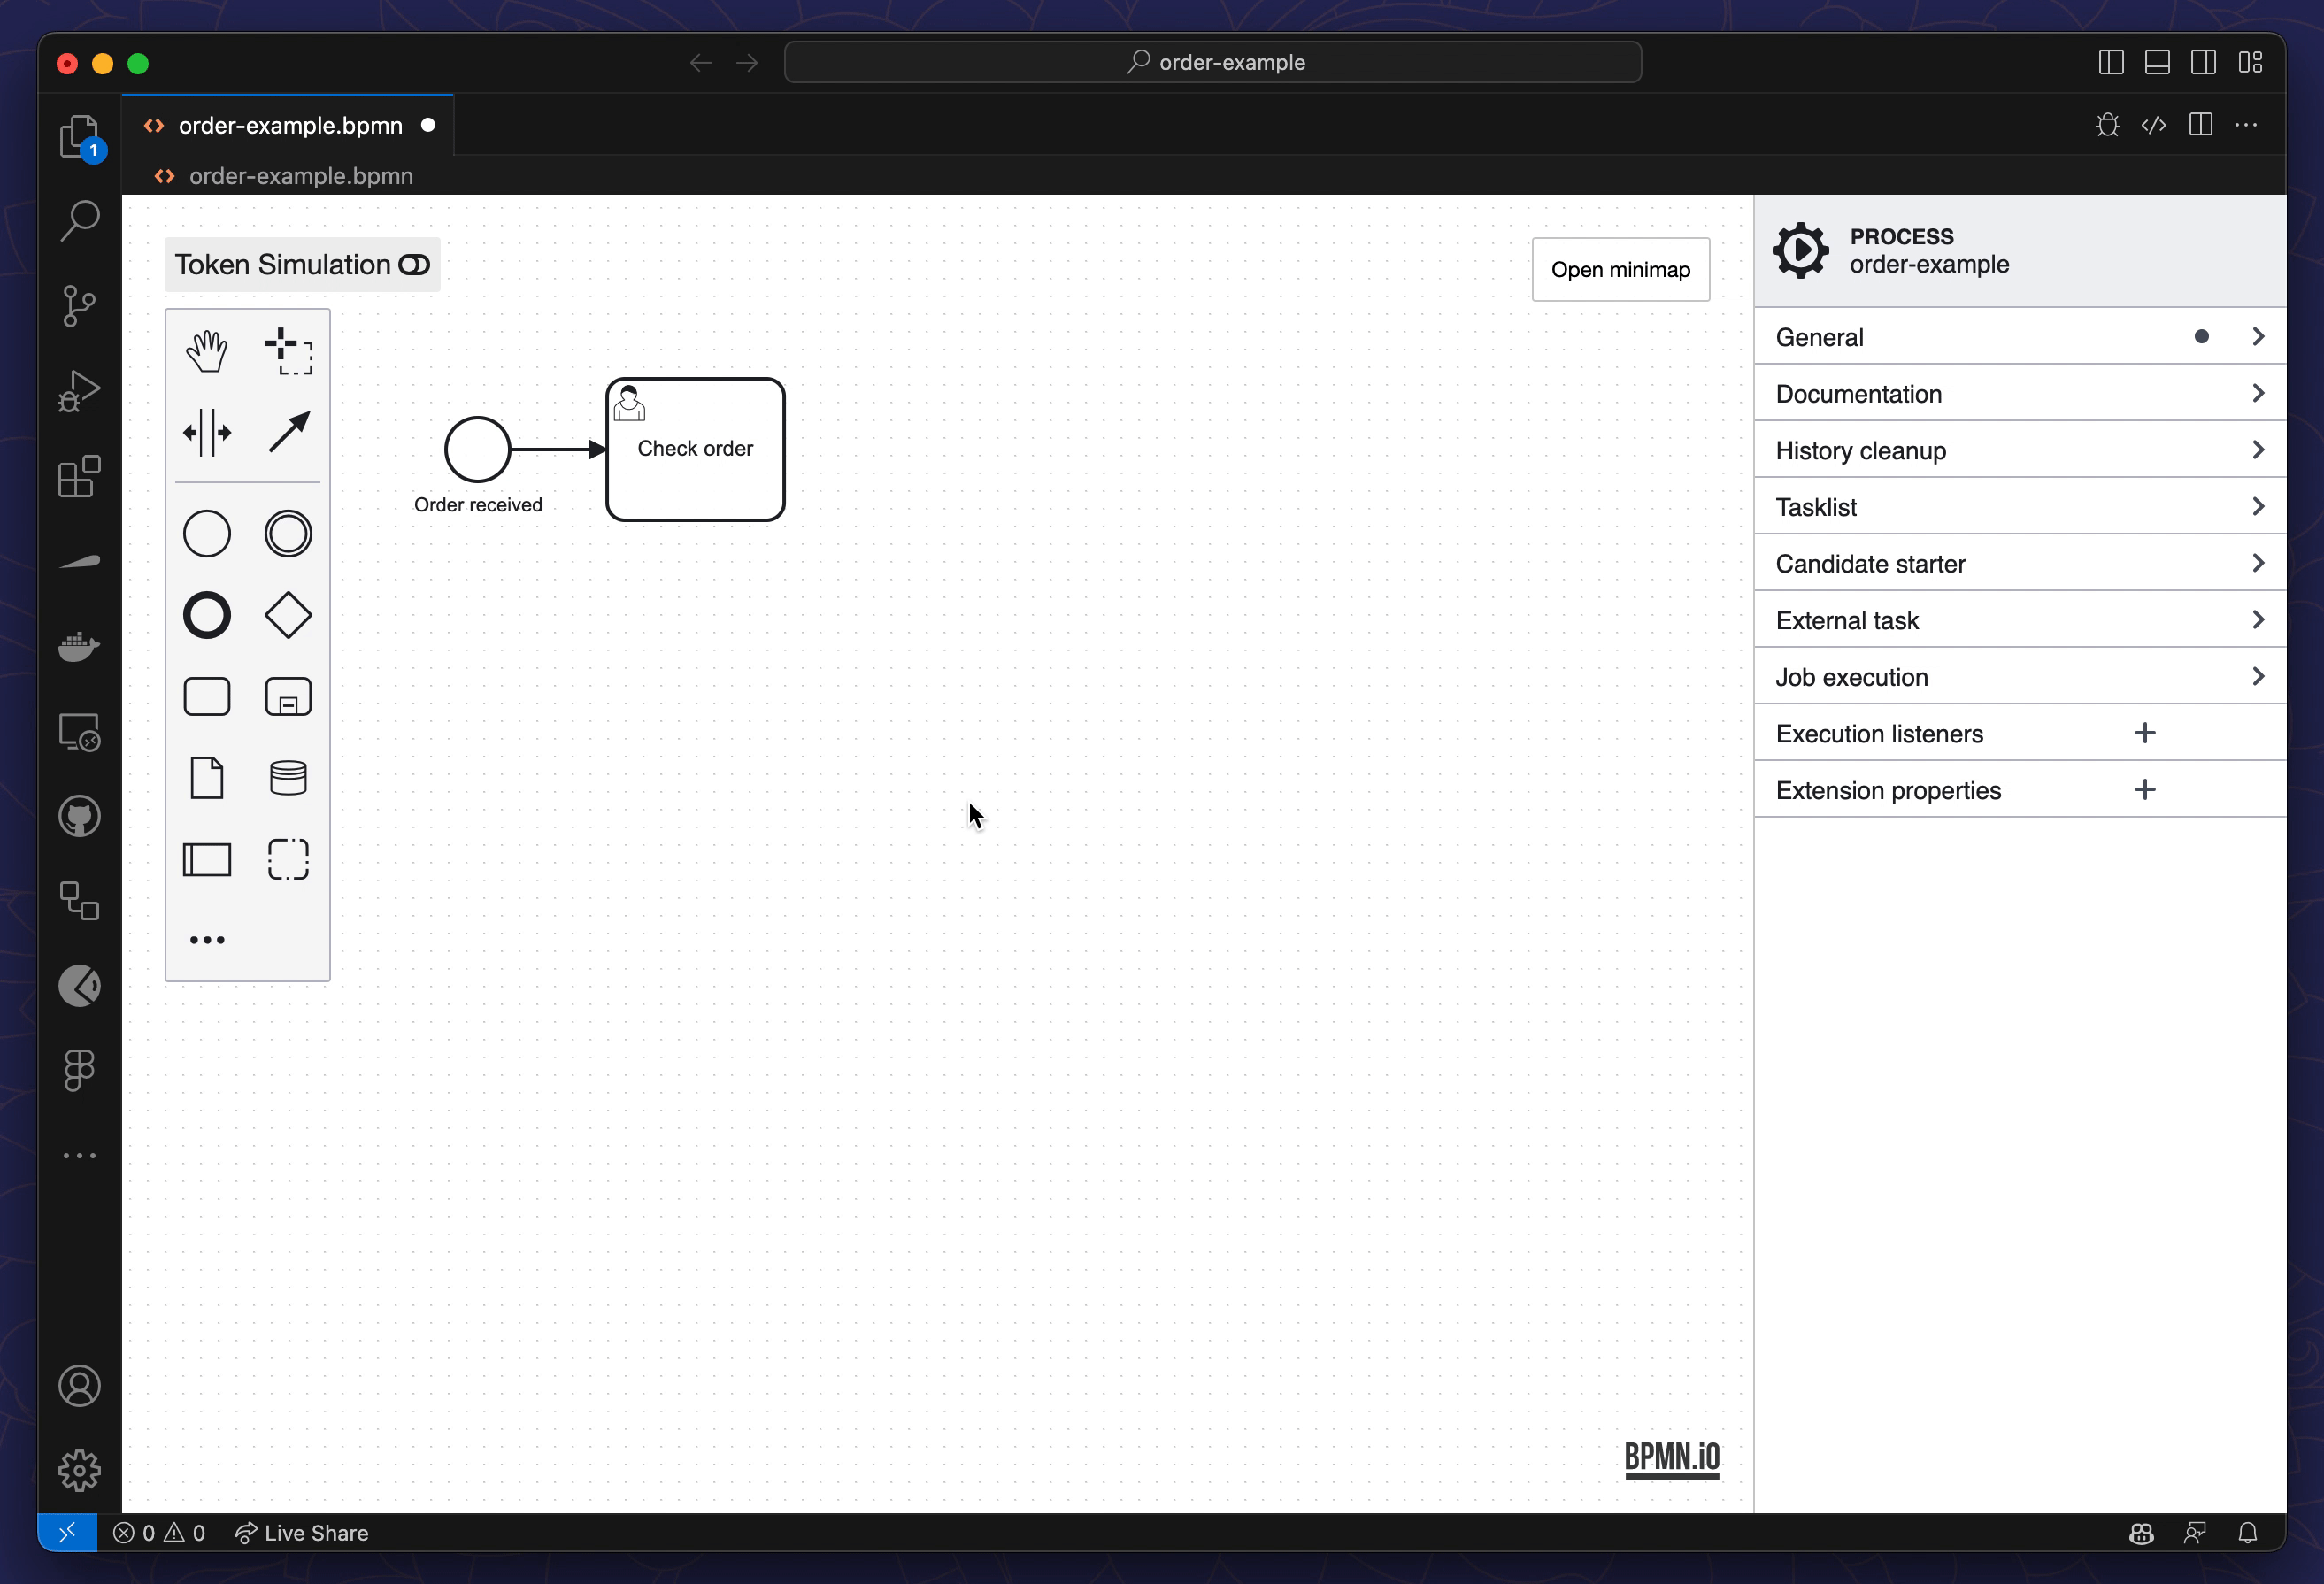
Repeat steps 2-4 to add further elements to your process until it looks like this:
Create a Decision Table
You can use the DMN Modeler for your DMN 1.3 models.
The Modeler opens on .dmn files and the UI Elements are the same as in the BPMN Modeler.
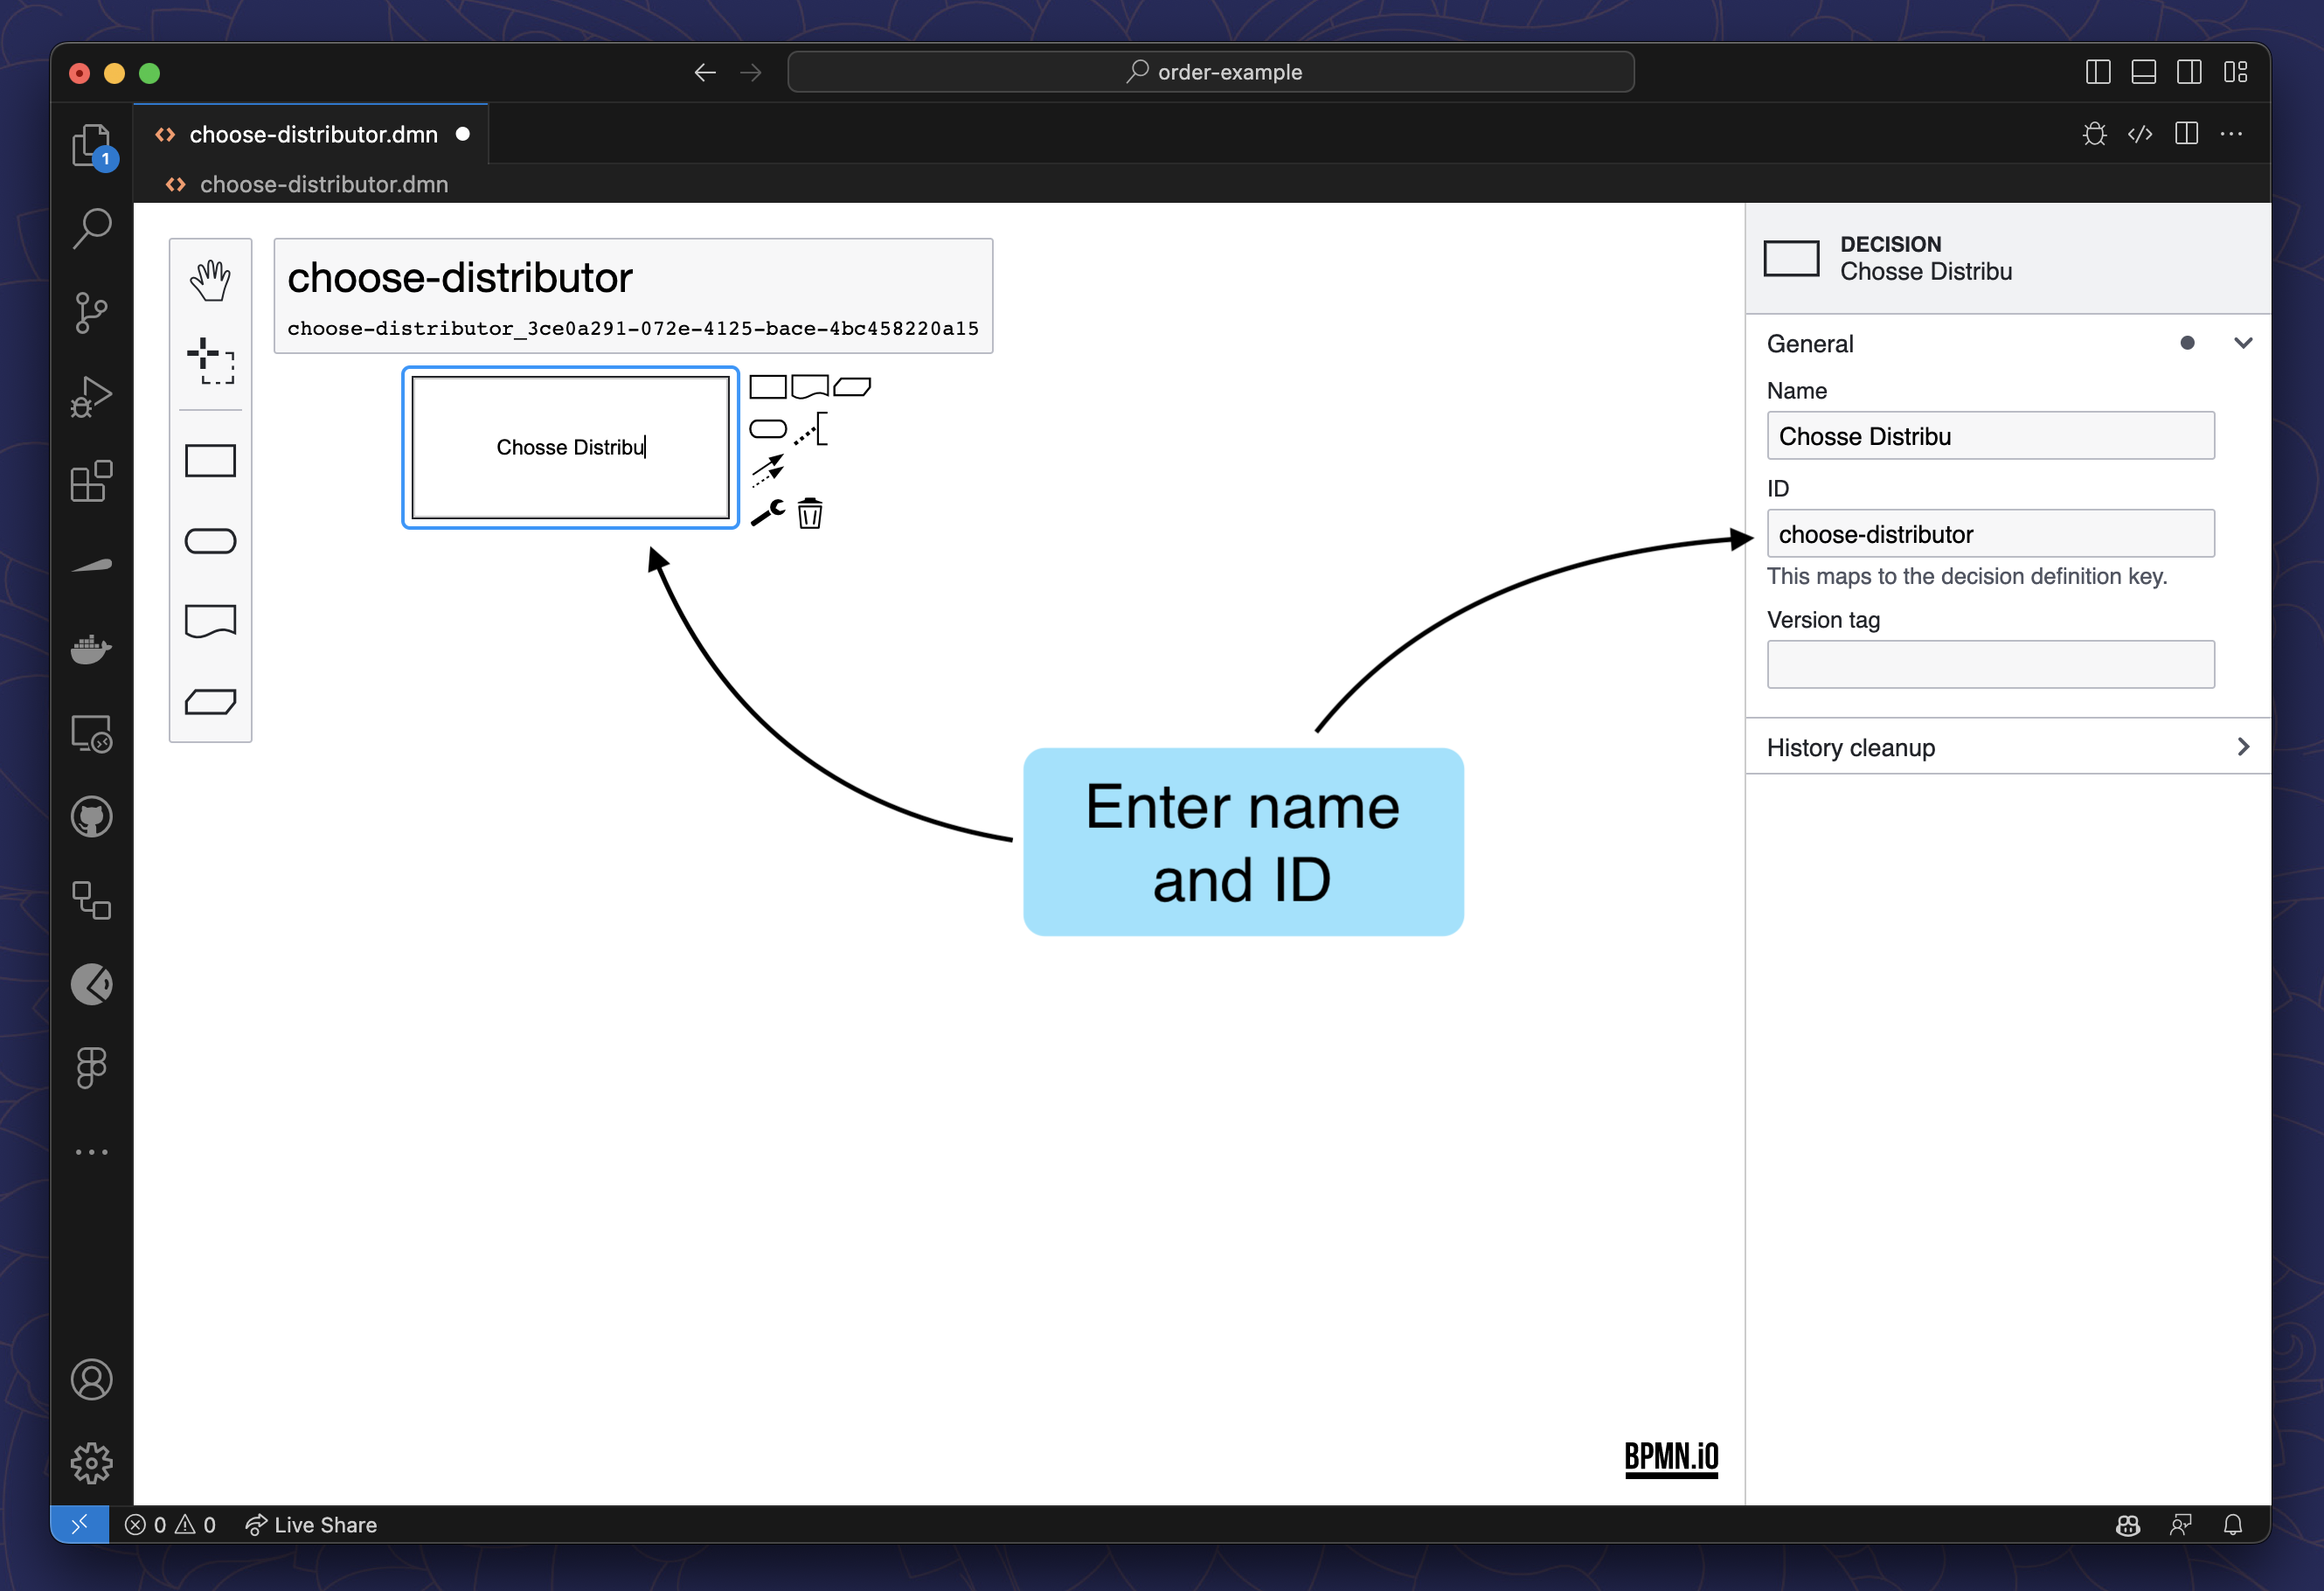
If you generated the .dmn file with the Miranum Console, it already contains a Decision.
Double-click on it and enter a name
Drill down to the decision table by clicking on the
Table Buttonin the top left corner of the decision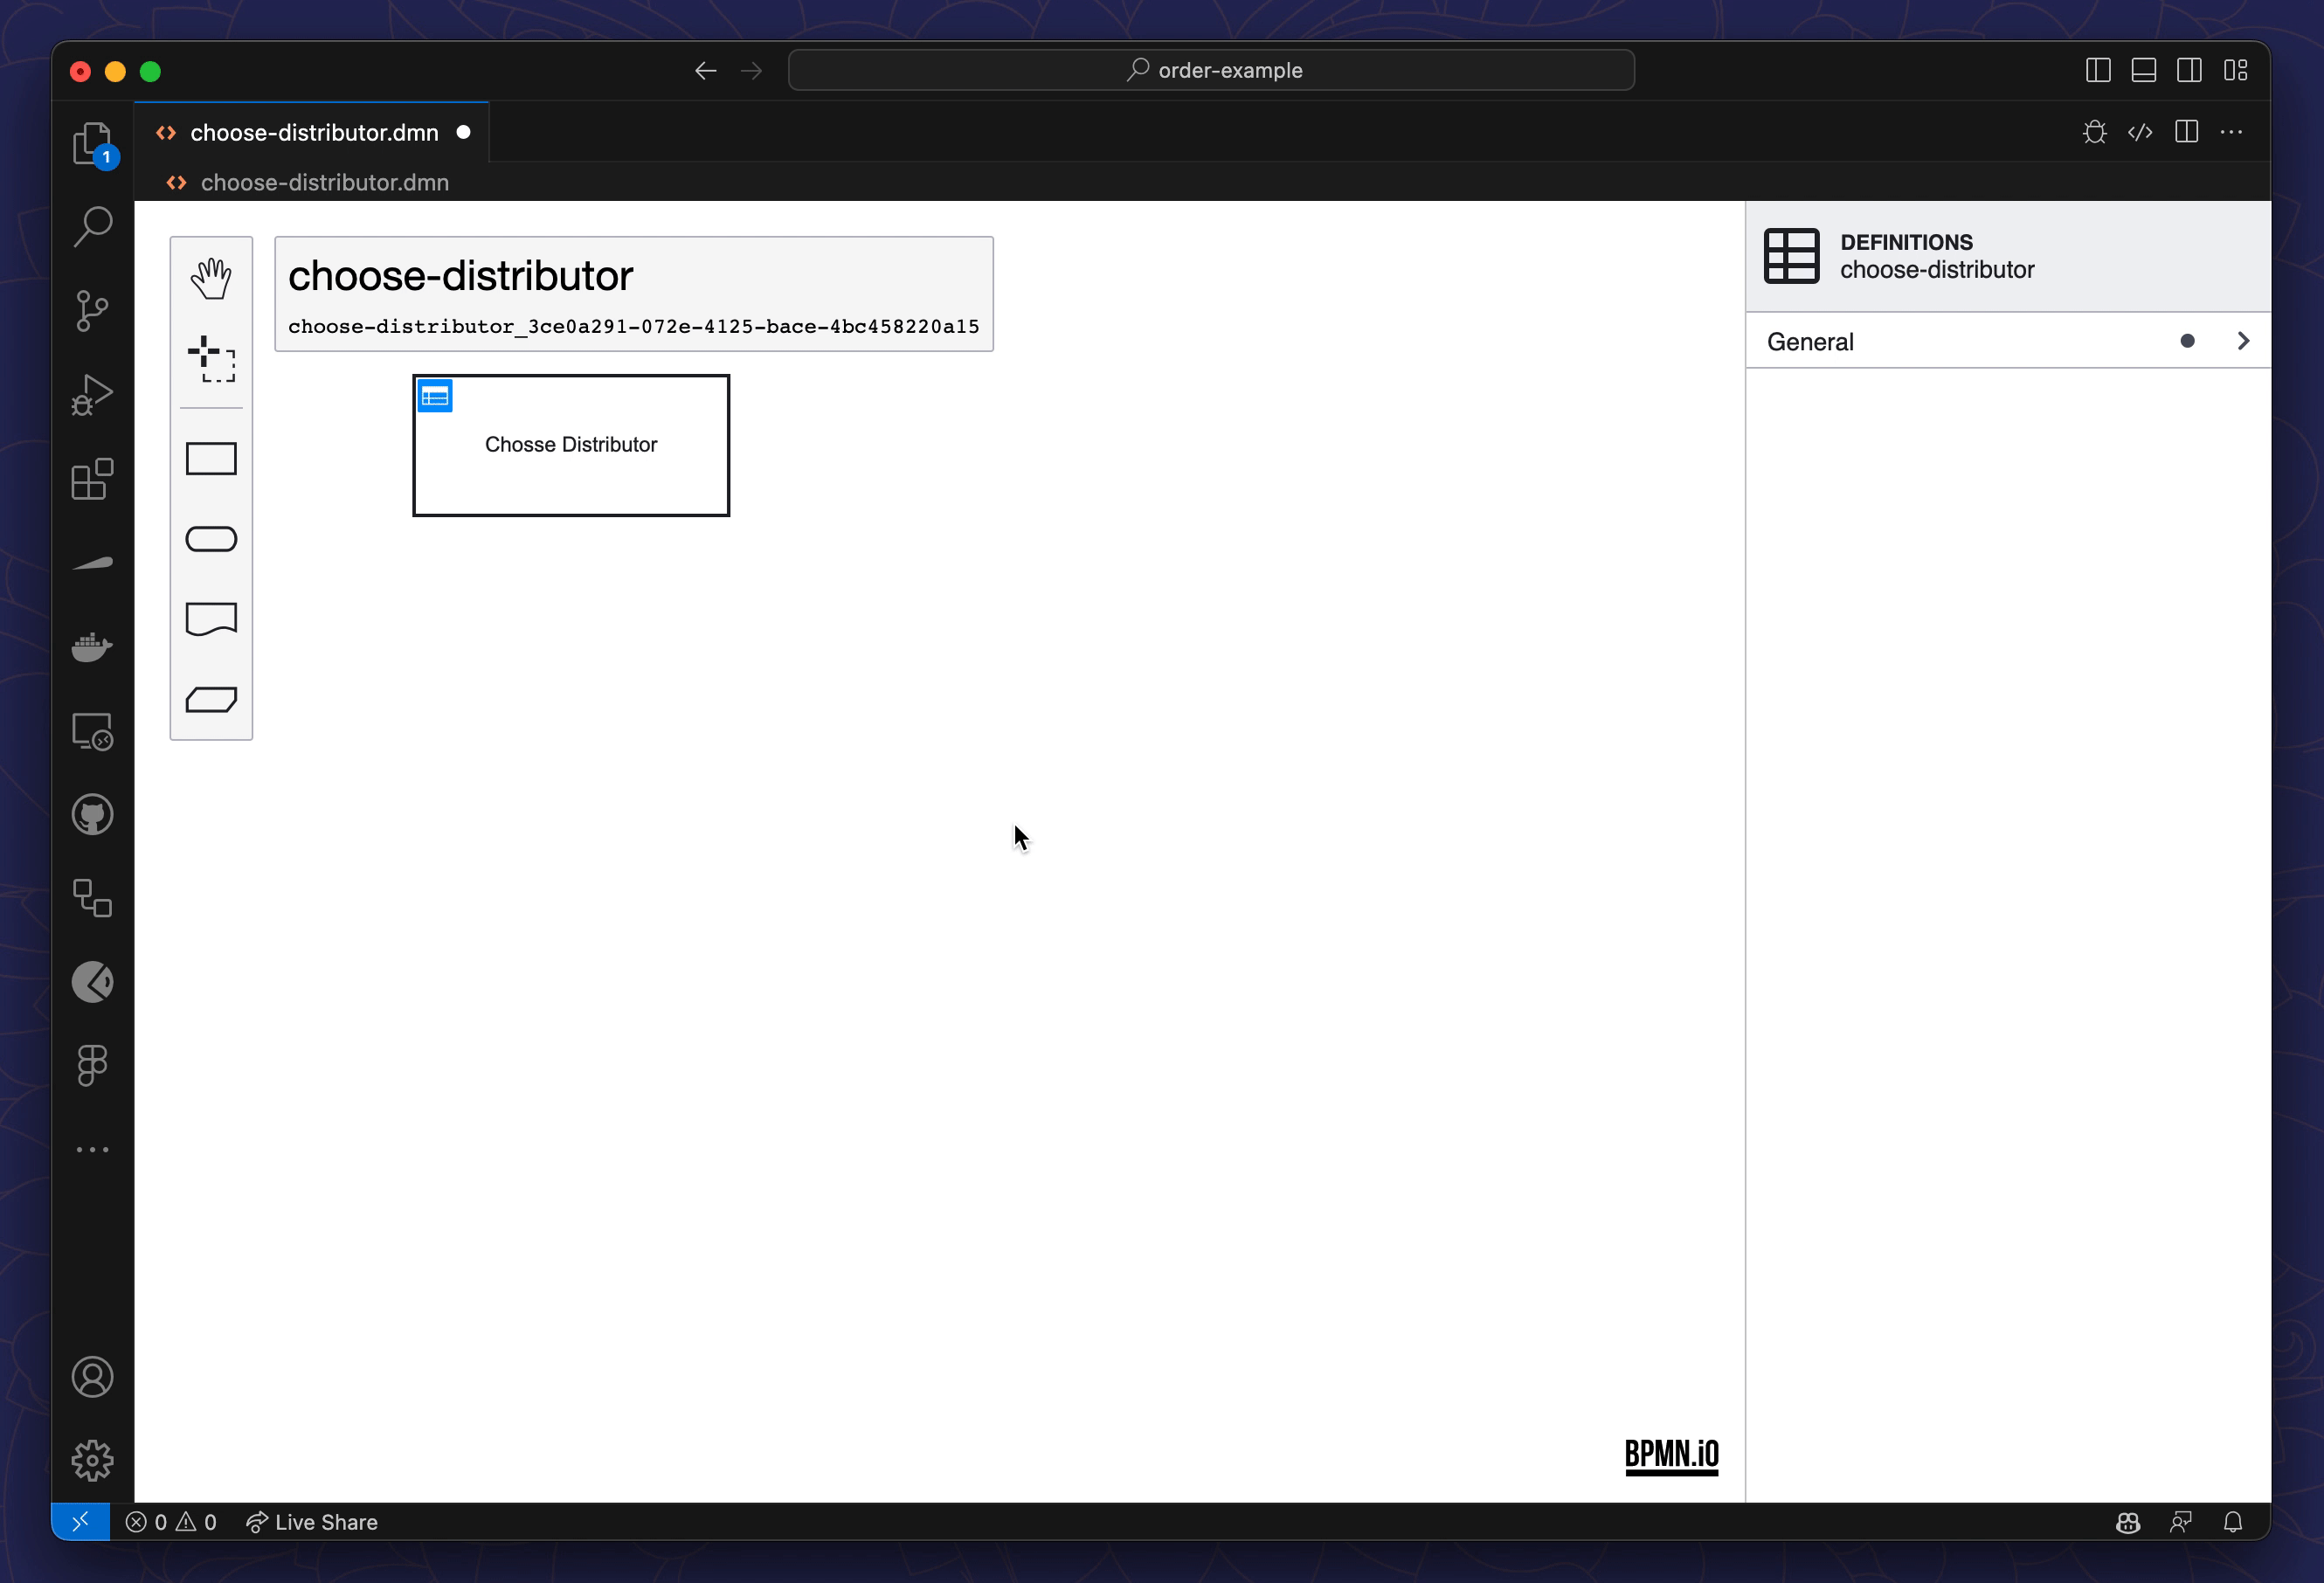
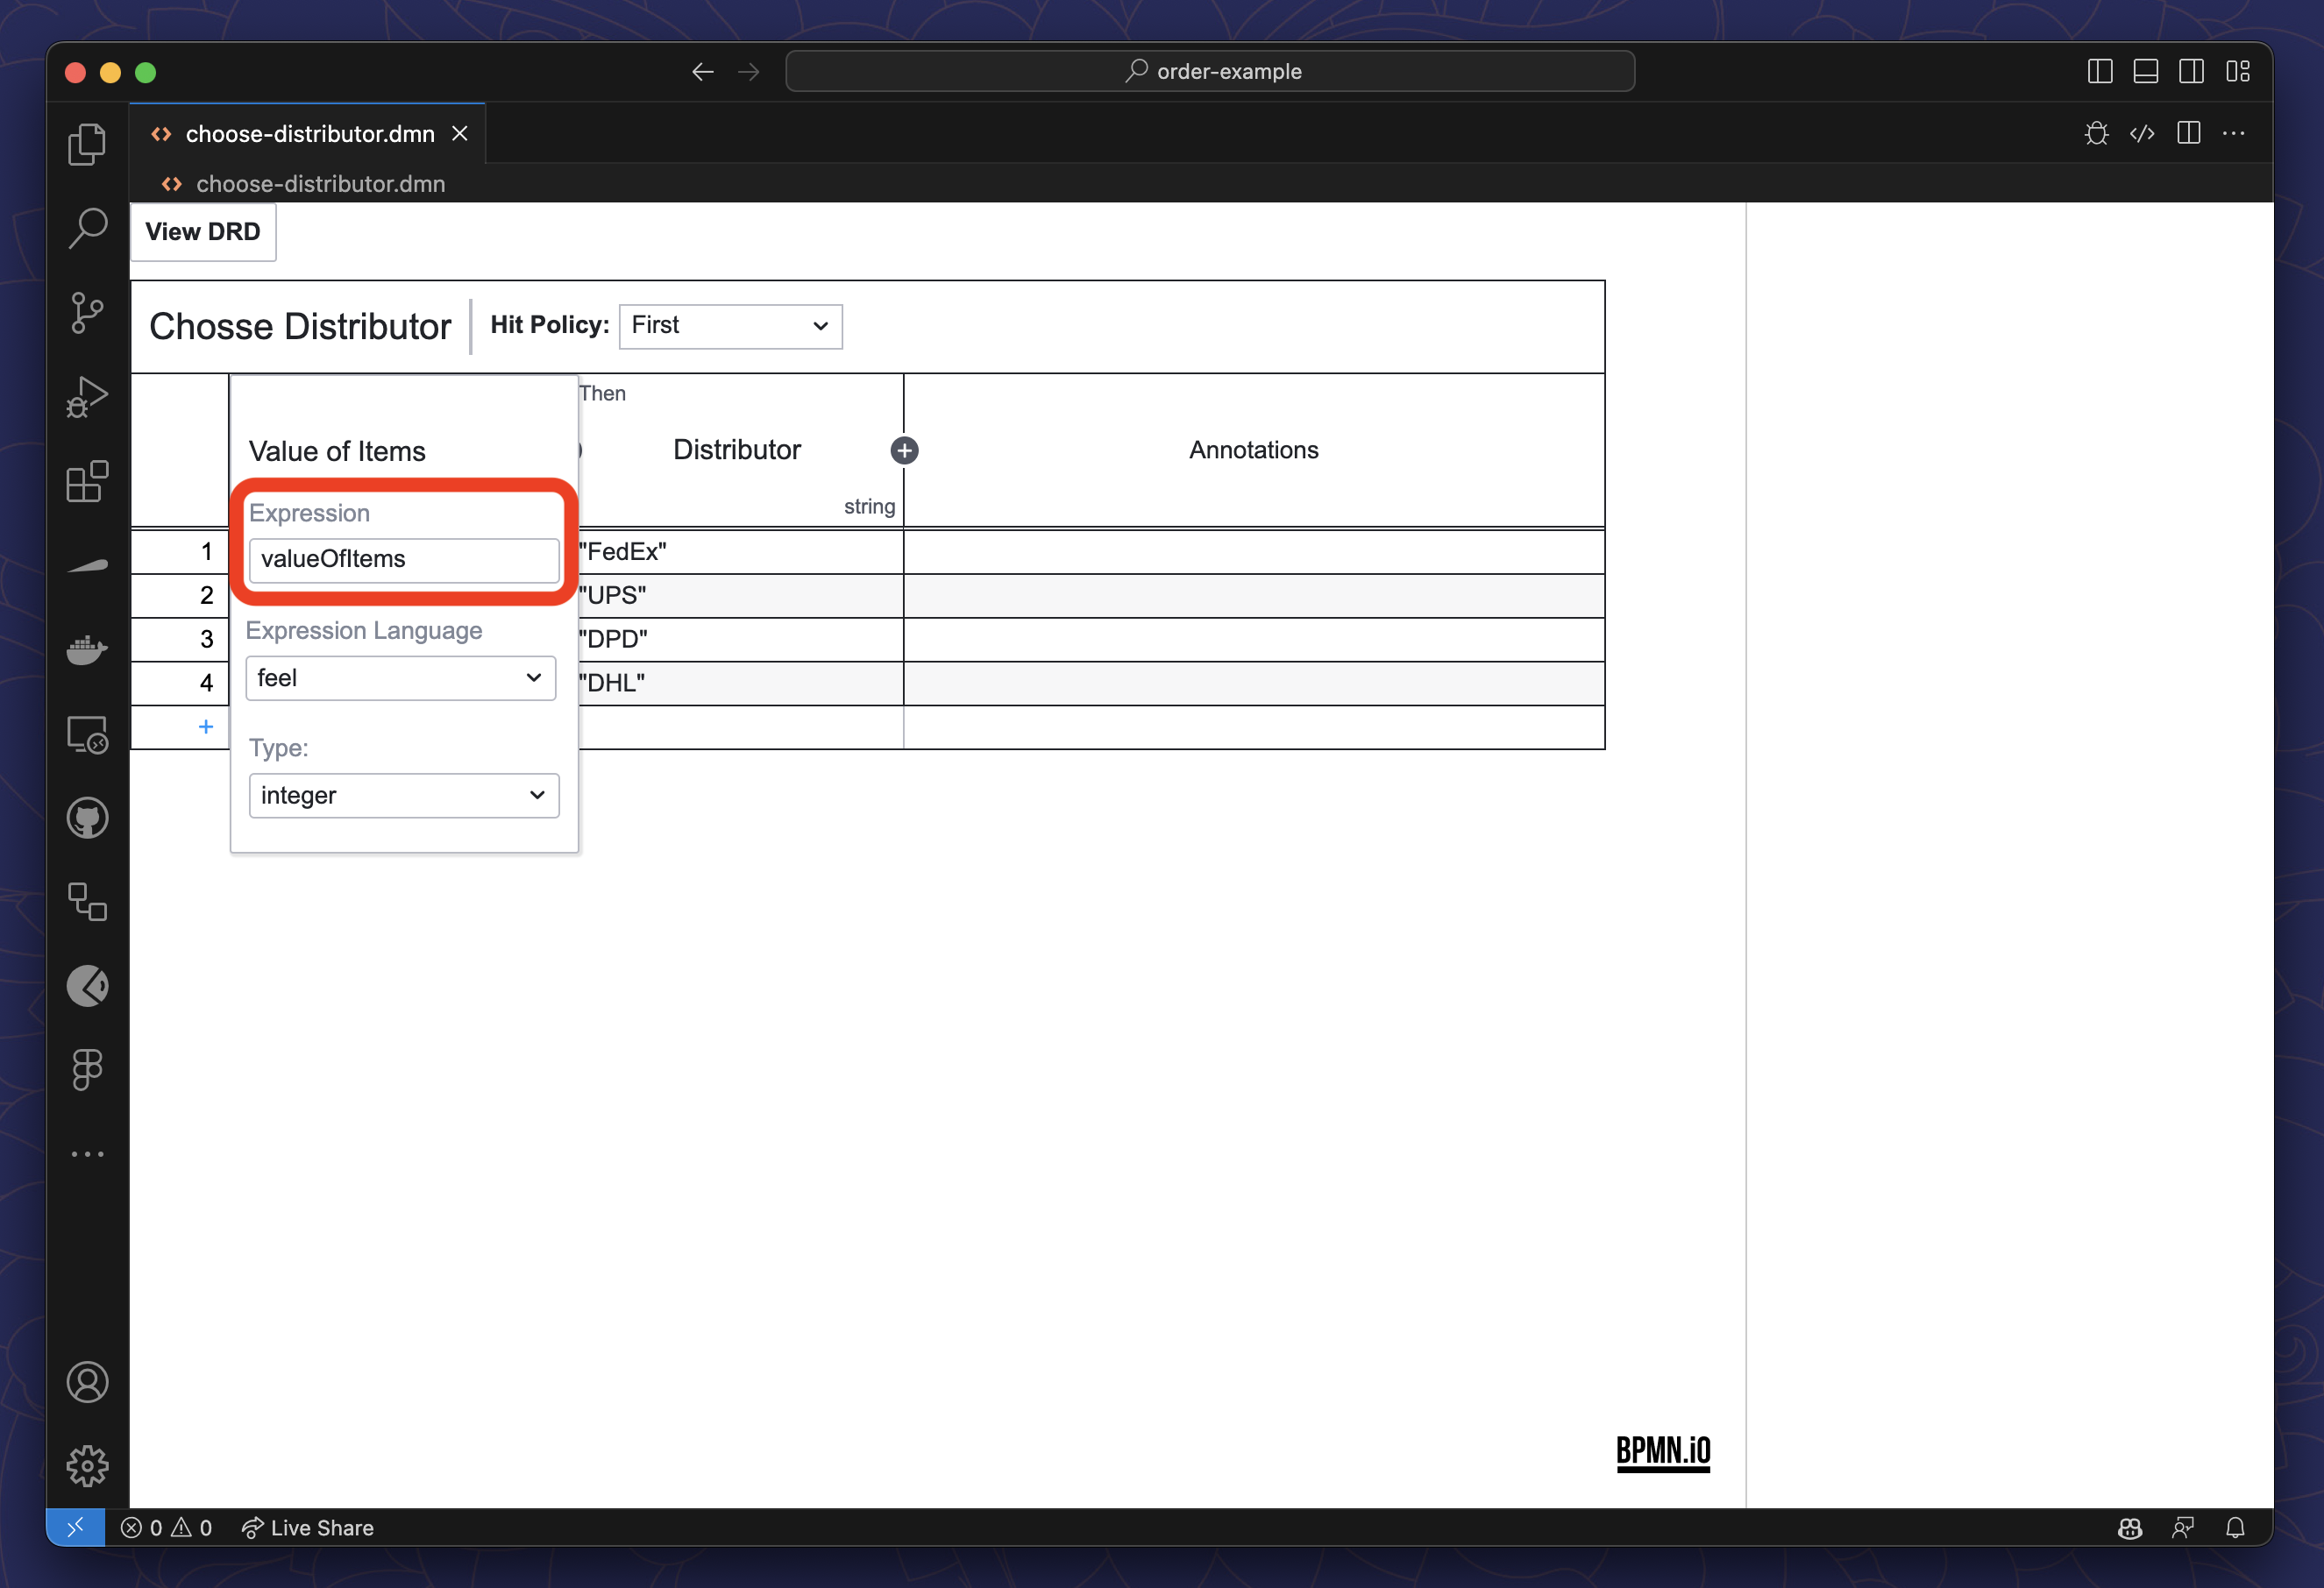
Define the input
- Double-click on
When - Enter a label
- Enter the input expression (the variable from the process that holds the value)
- Select the type of the input
- Close the modal menu and add your rules by clicking on the
+button
Define Input Add Rules 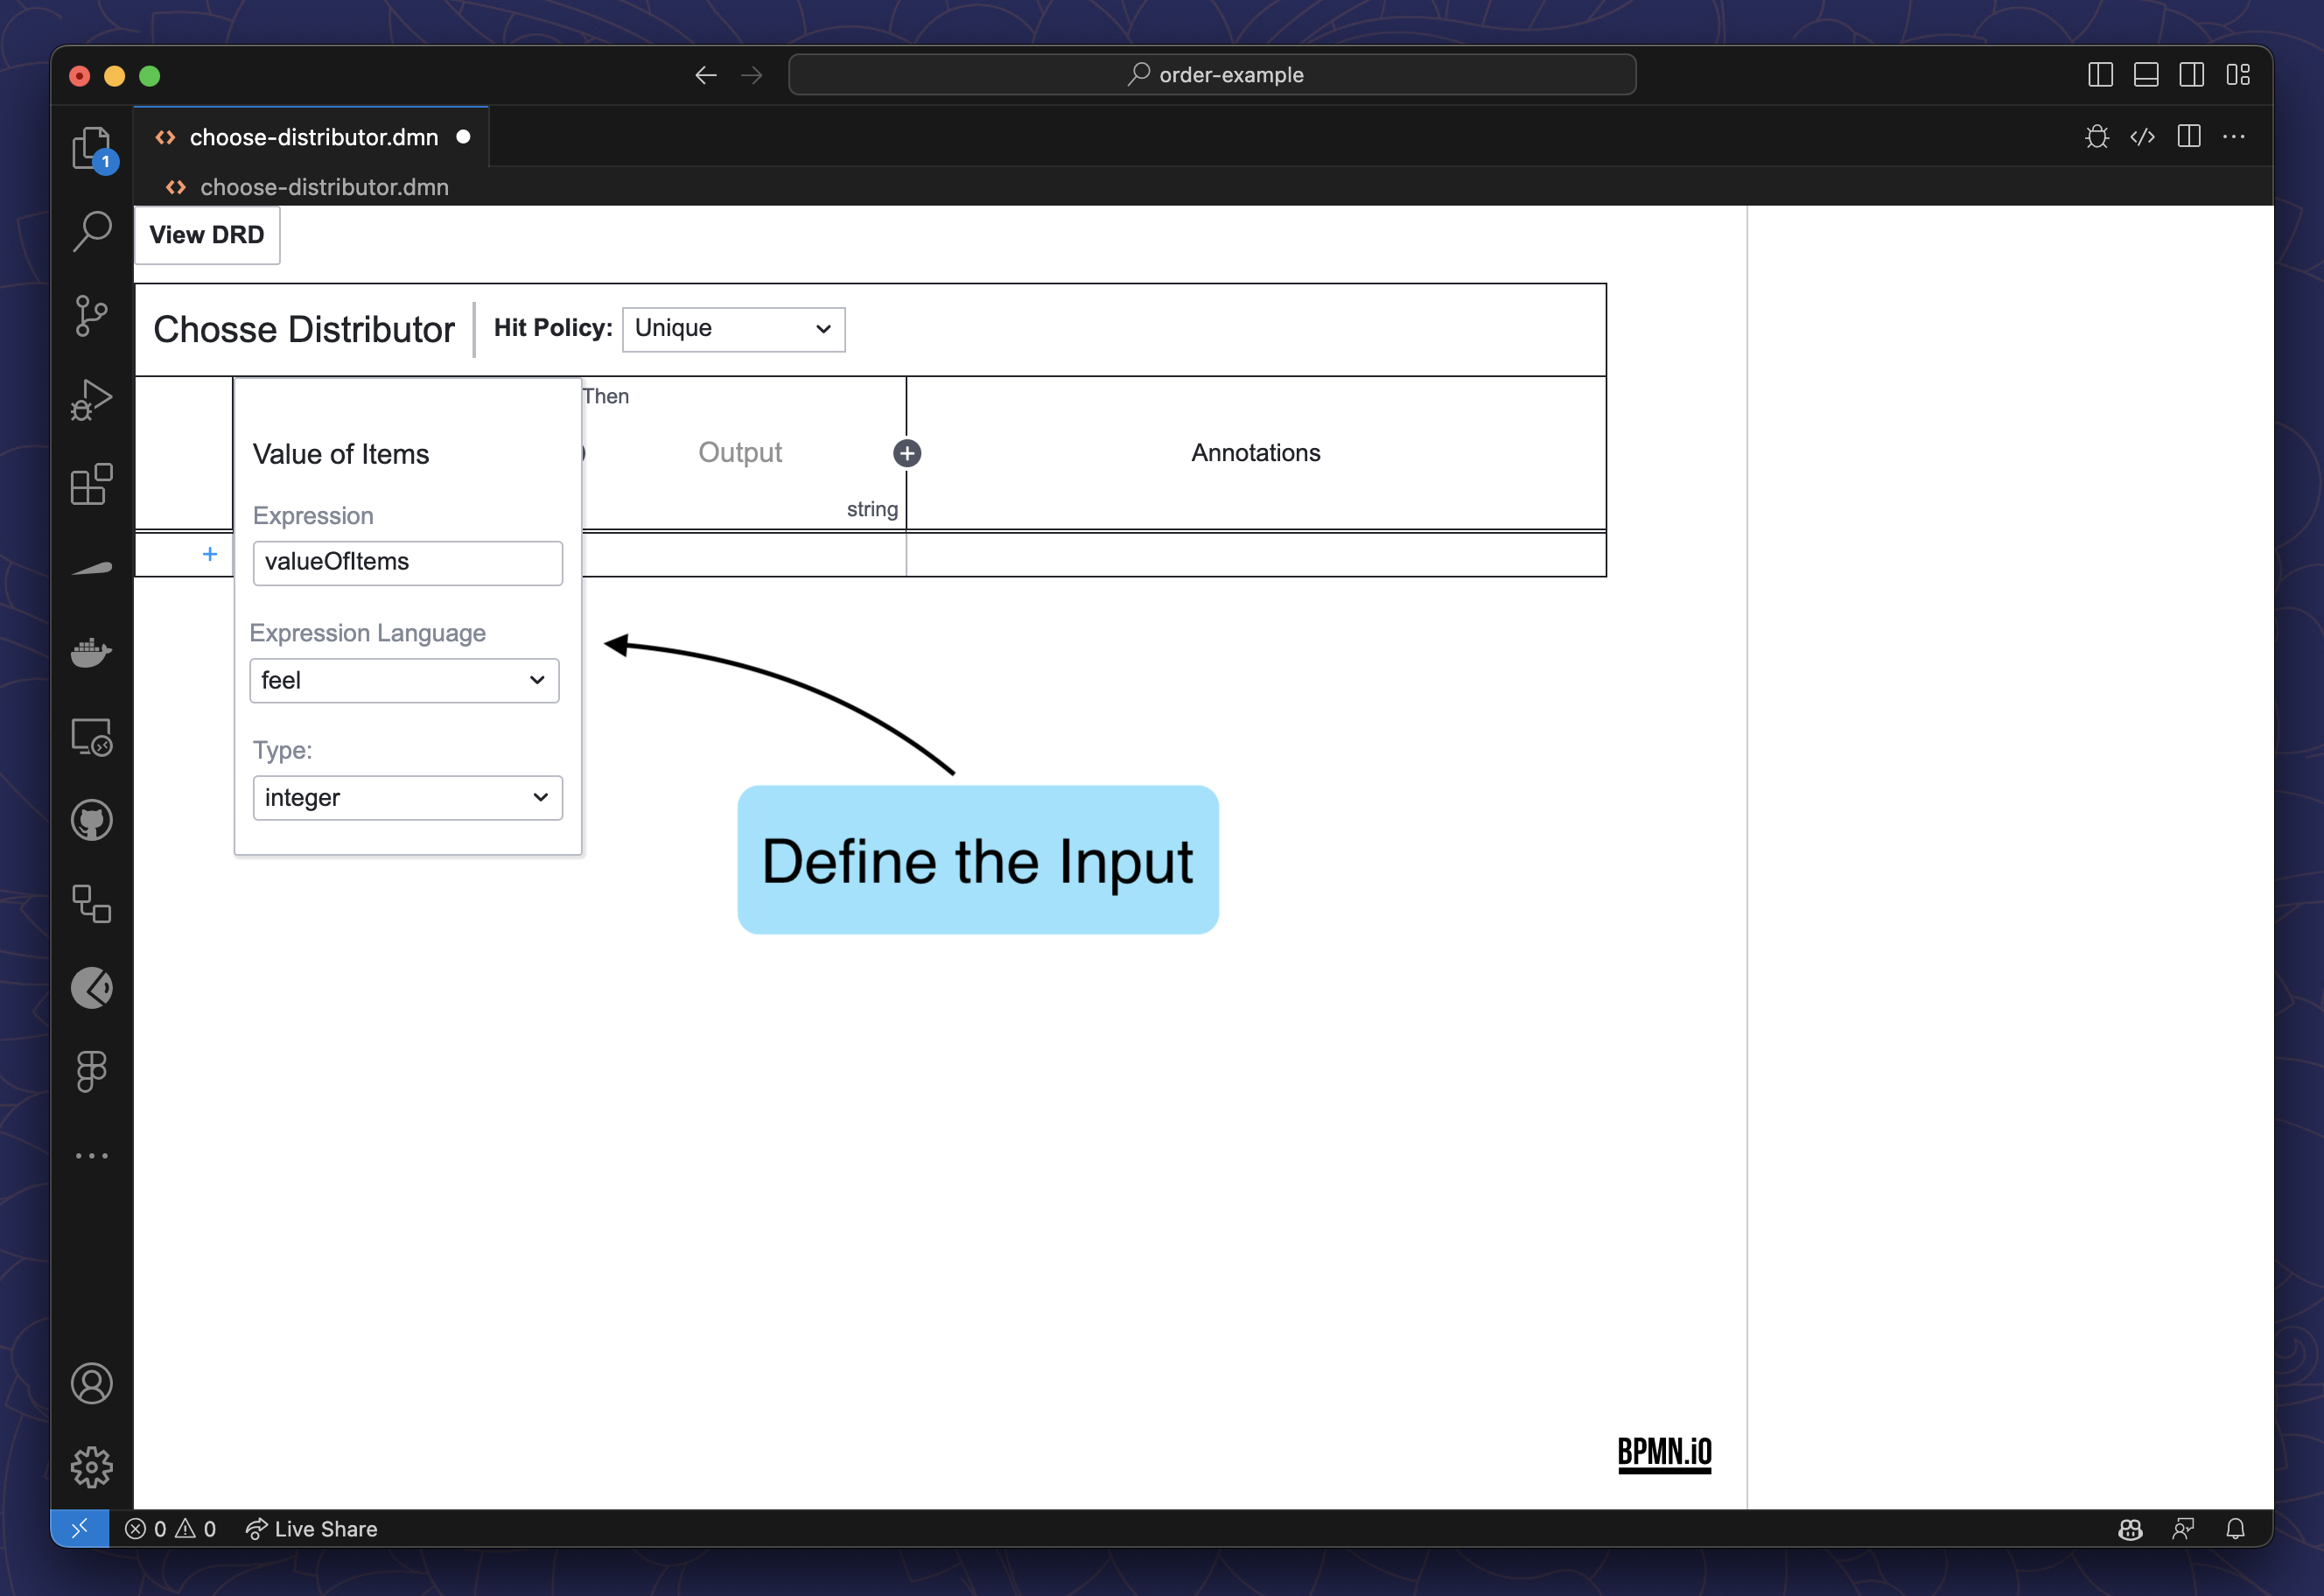

- Double-click on
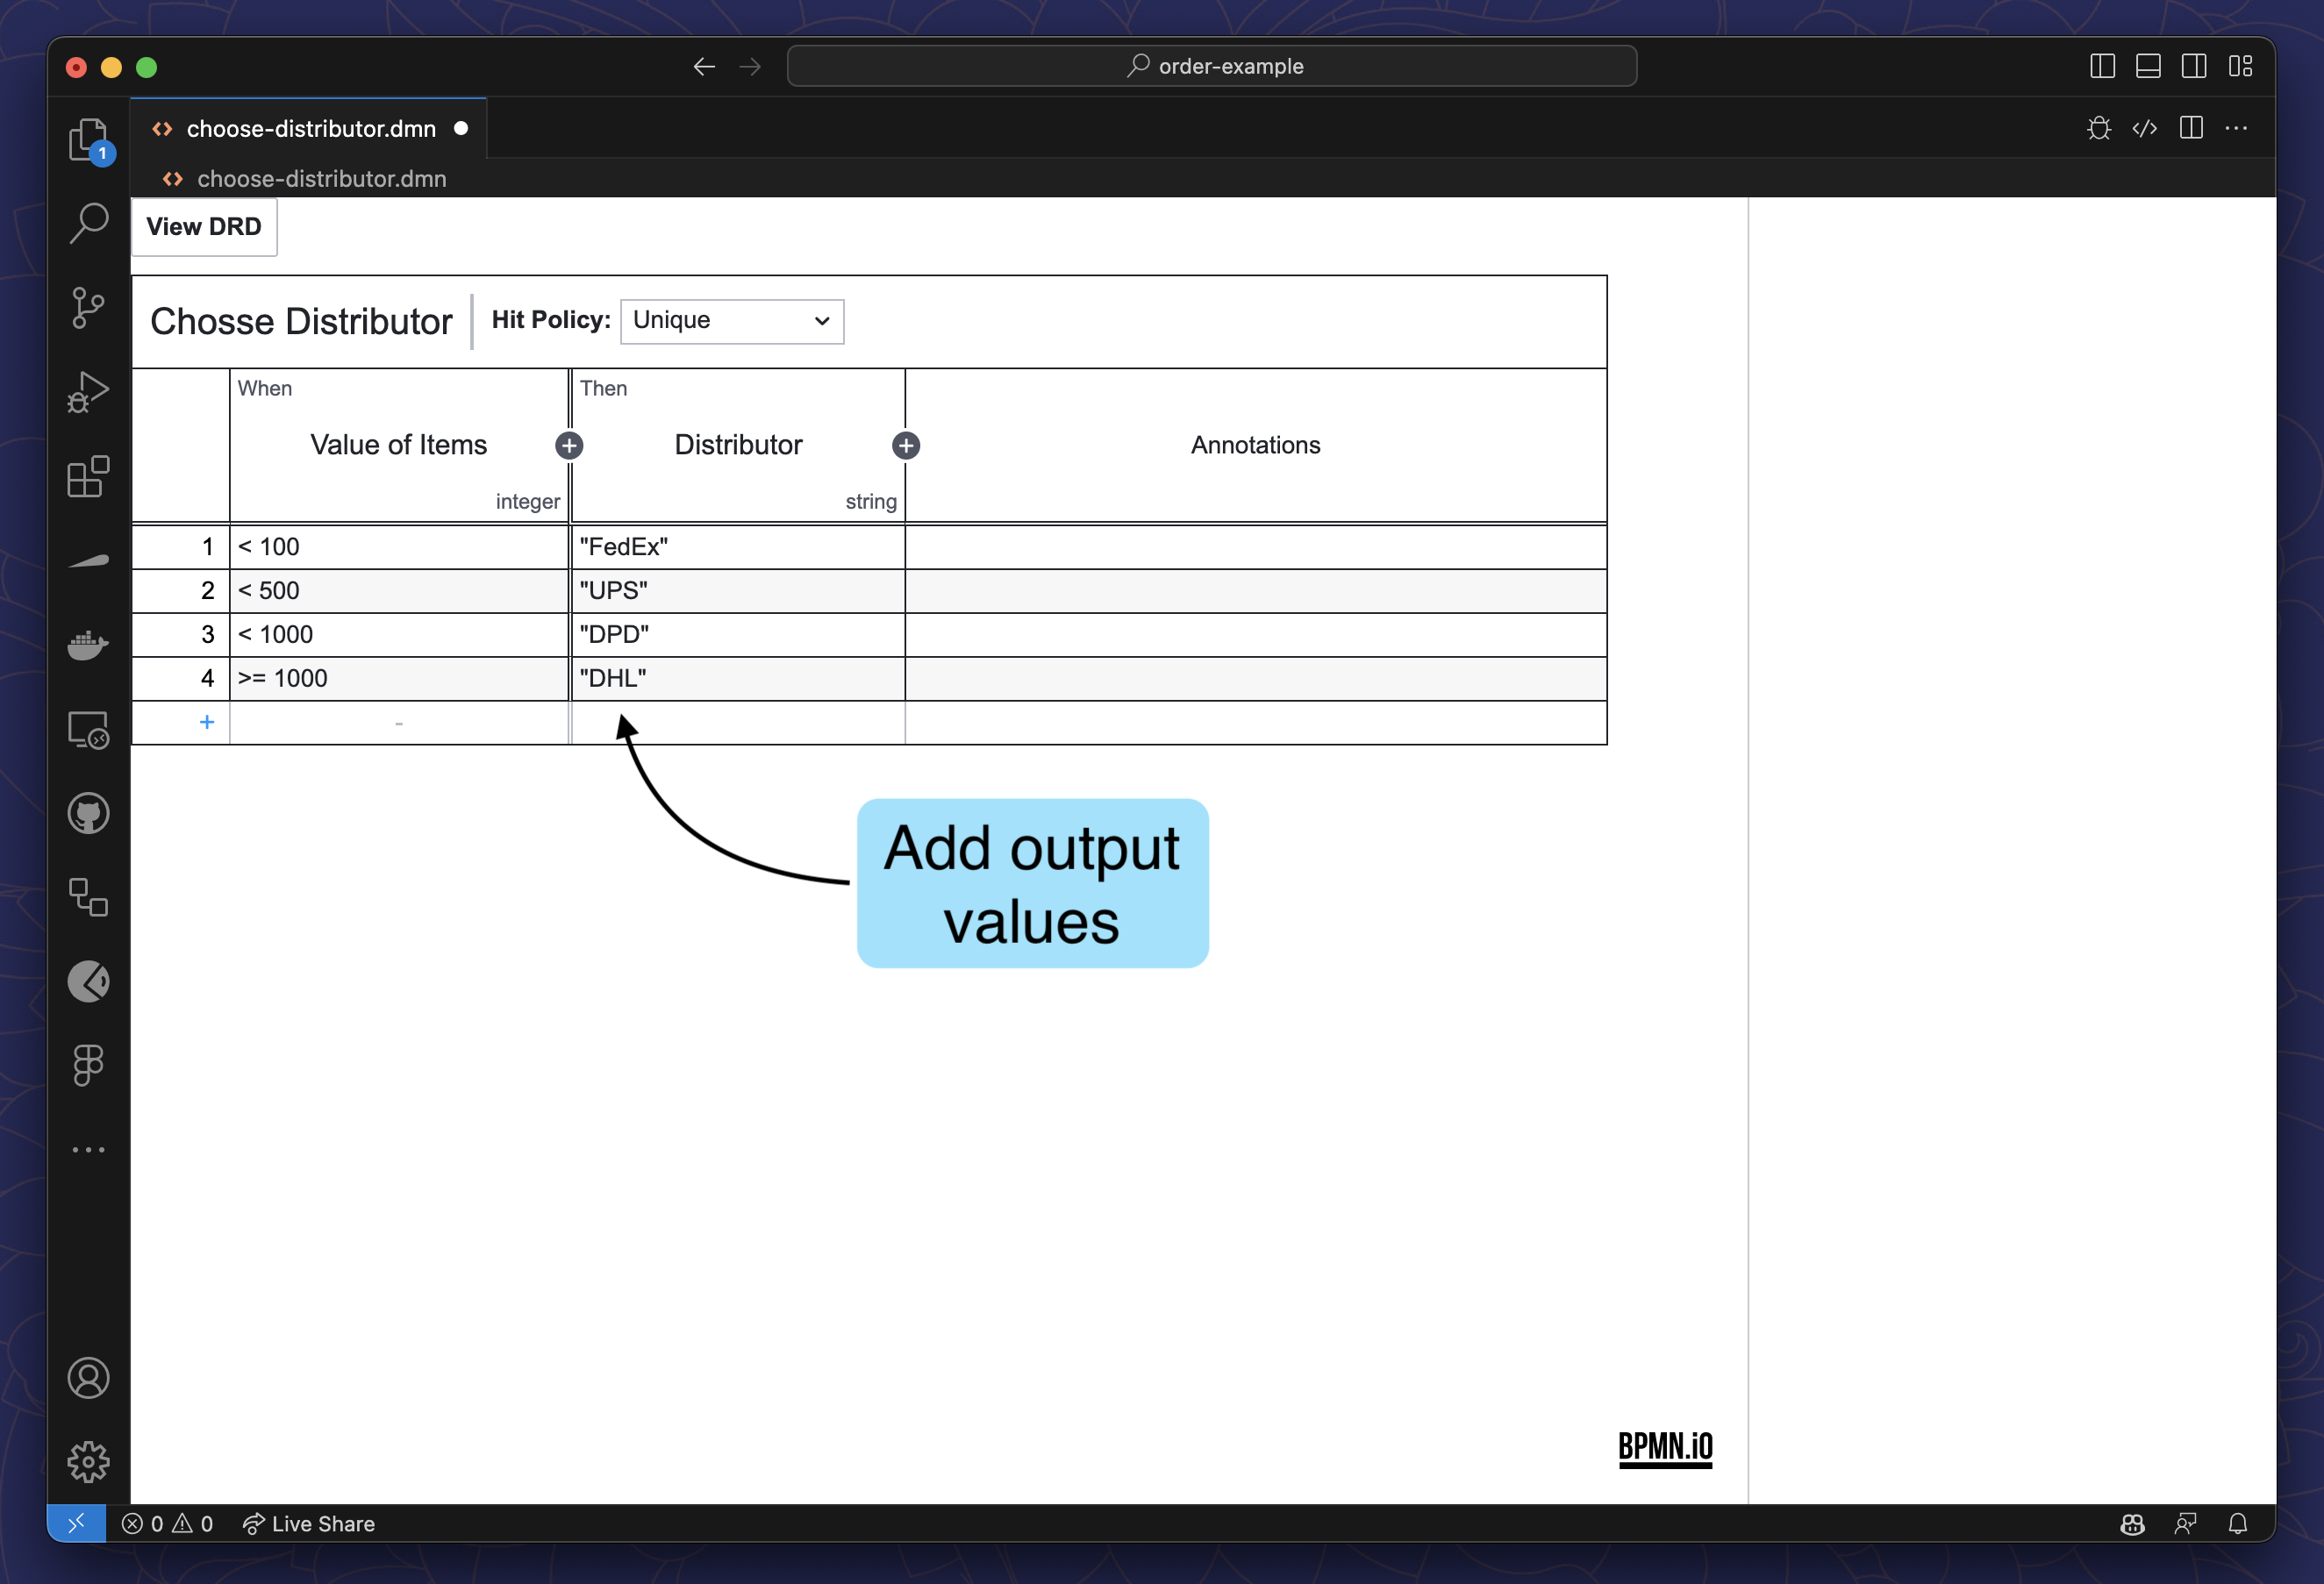
Define the output
- Double-click on
Then - Enter a label
- Enter the output expression (the variable that can be accessed in the process)
- Select the type of the output
- For every rule you added in step 3, add a corresponding output value
Define Output Add Output Values 
- Double-click on
Select your
Hit Policy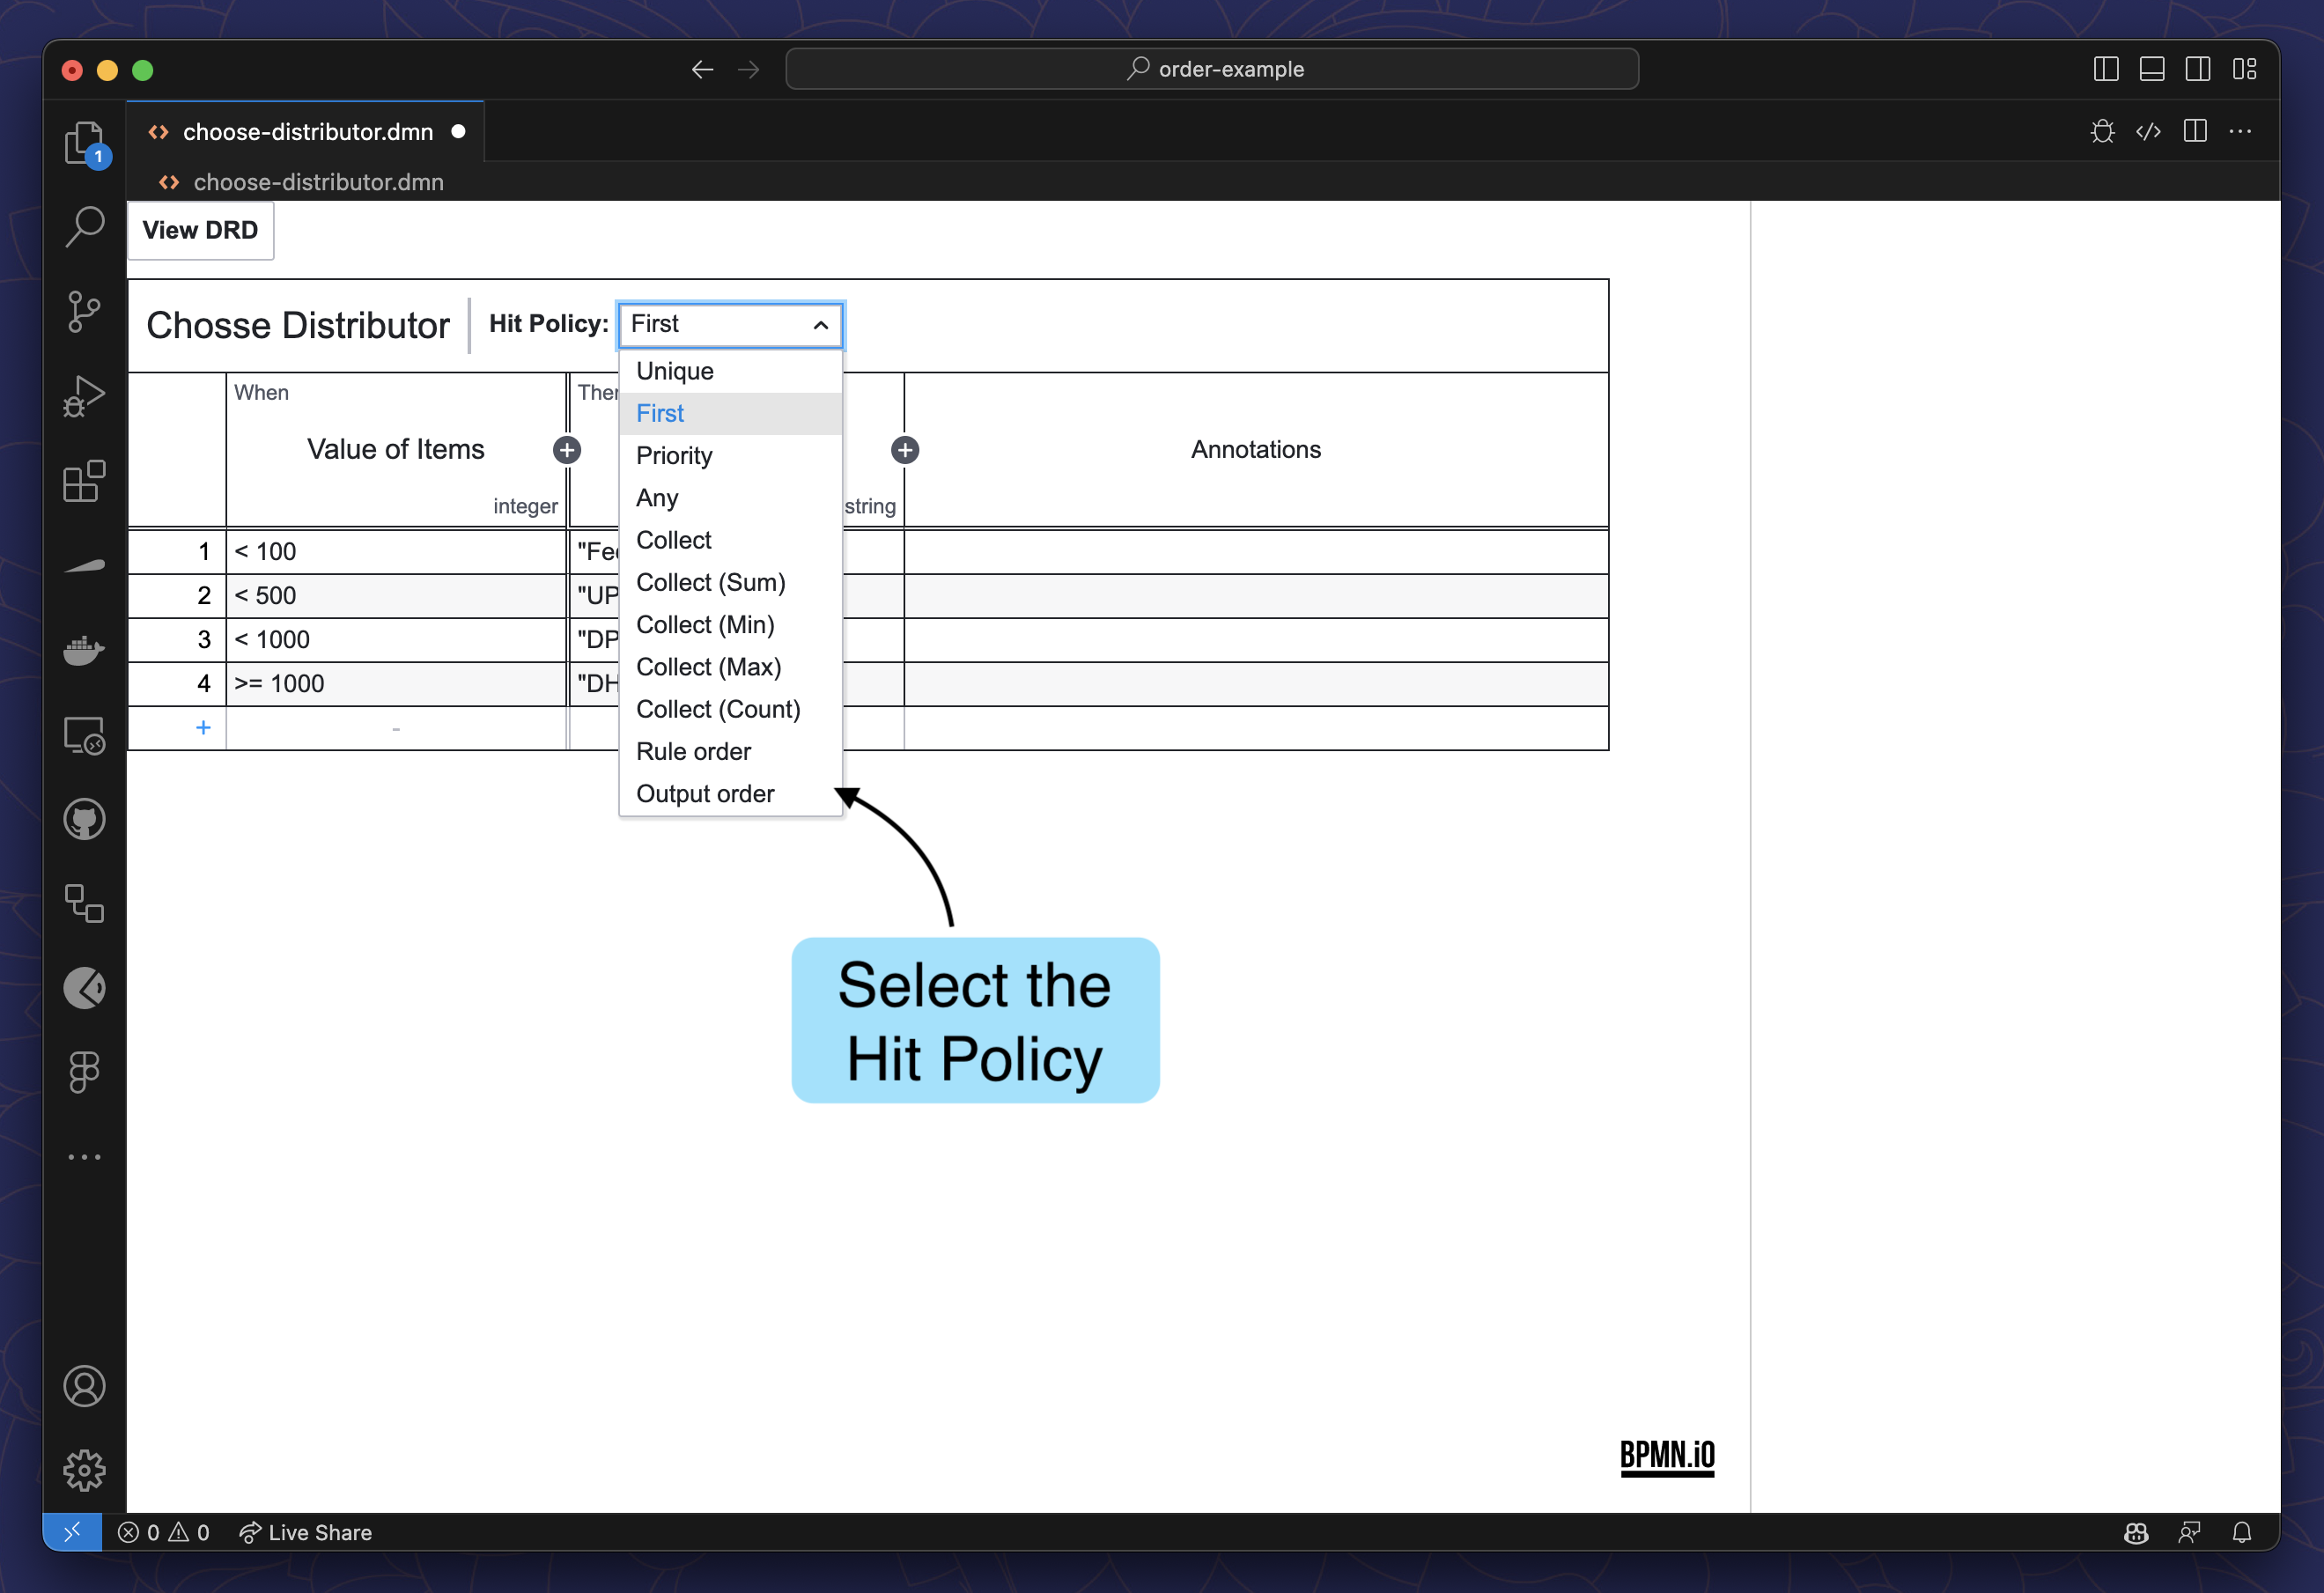
Link the Decision to your Process
Open your BPMN diagram
Select the
Business Rule TaskExpand
Implementationin the Properties PanelSelect
DMNas theTypeEnter the ID of your decision in the
Decision Reffield.dmn.bpmn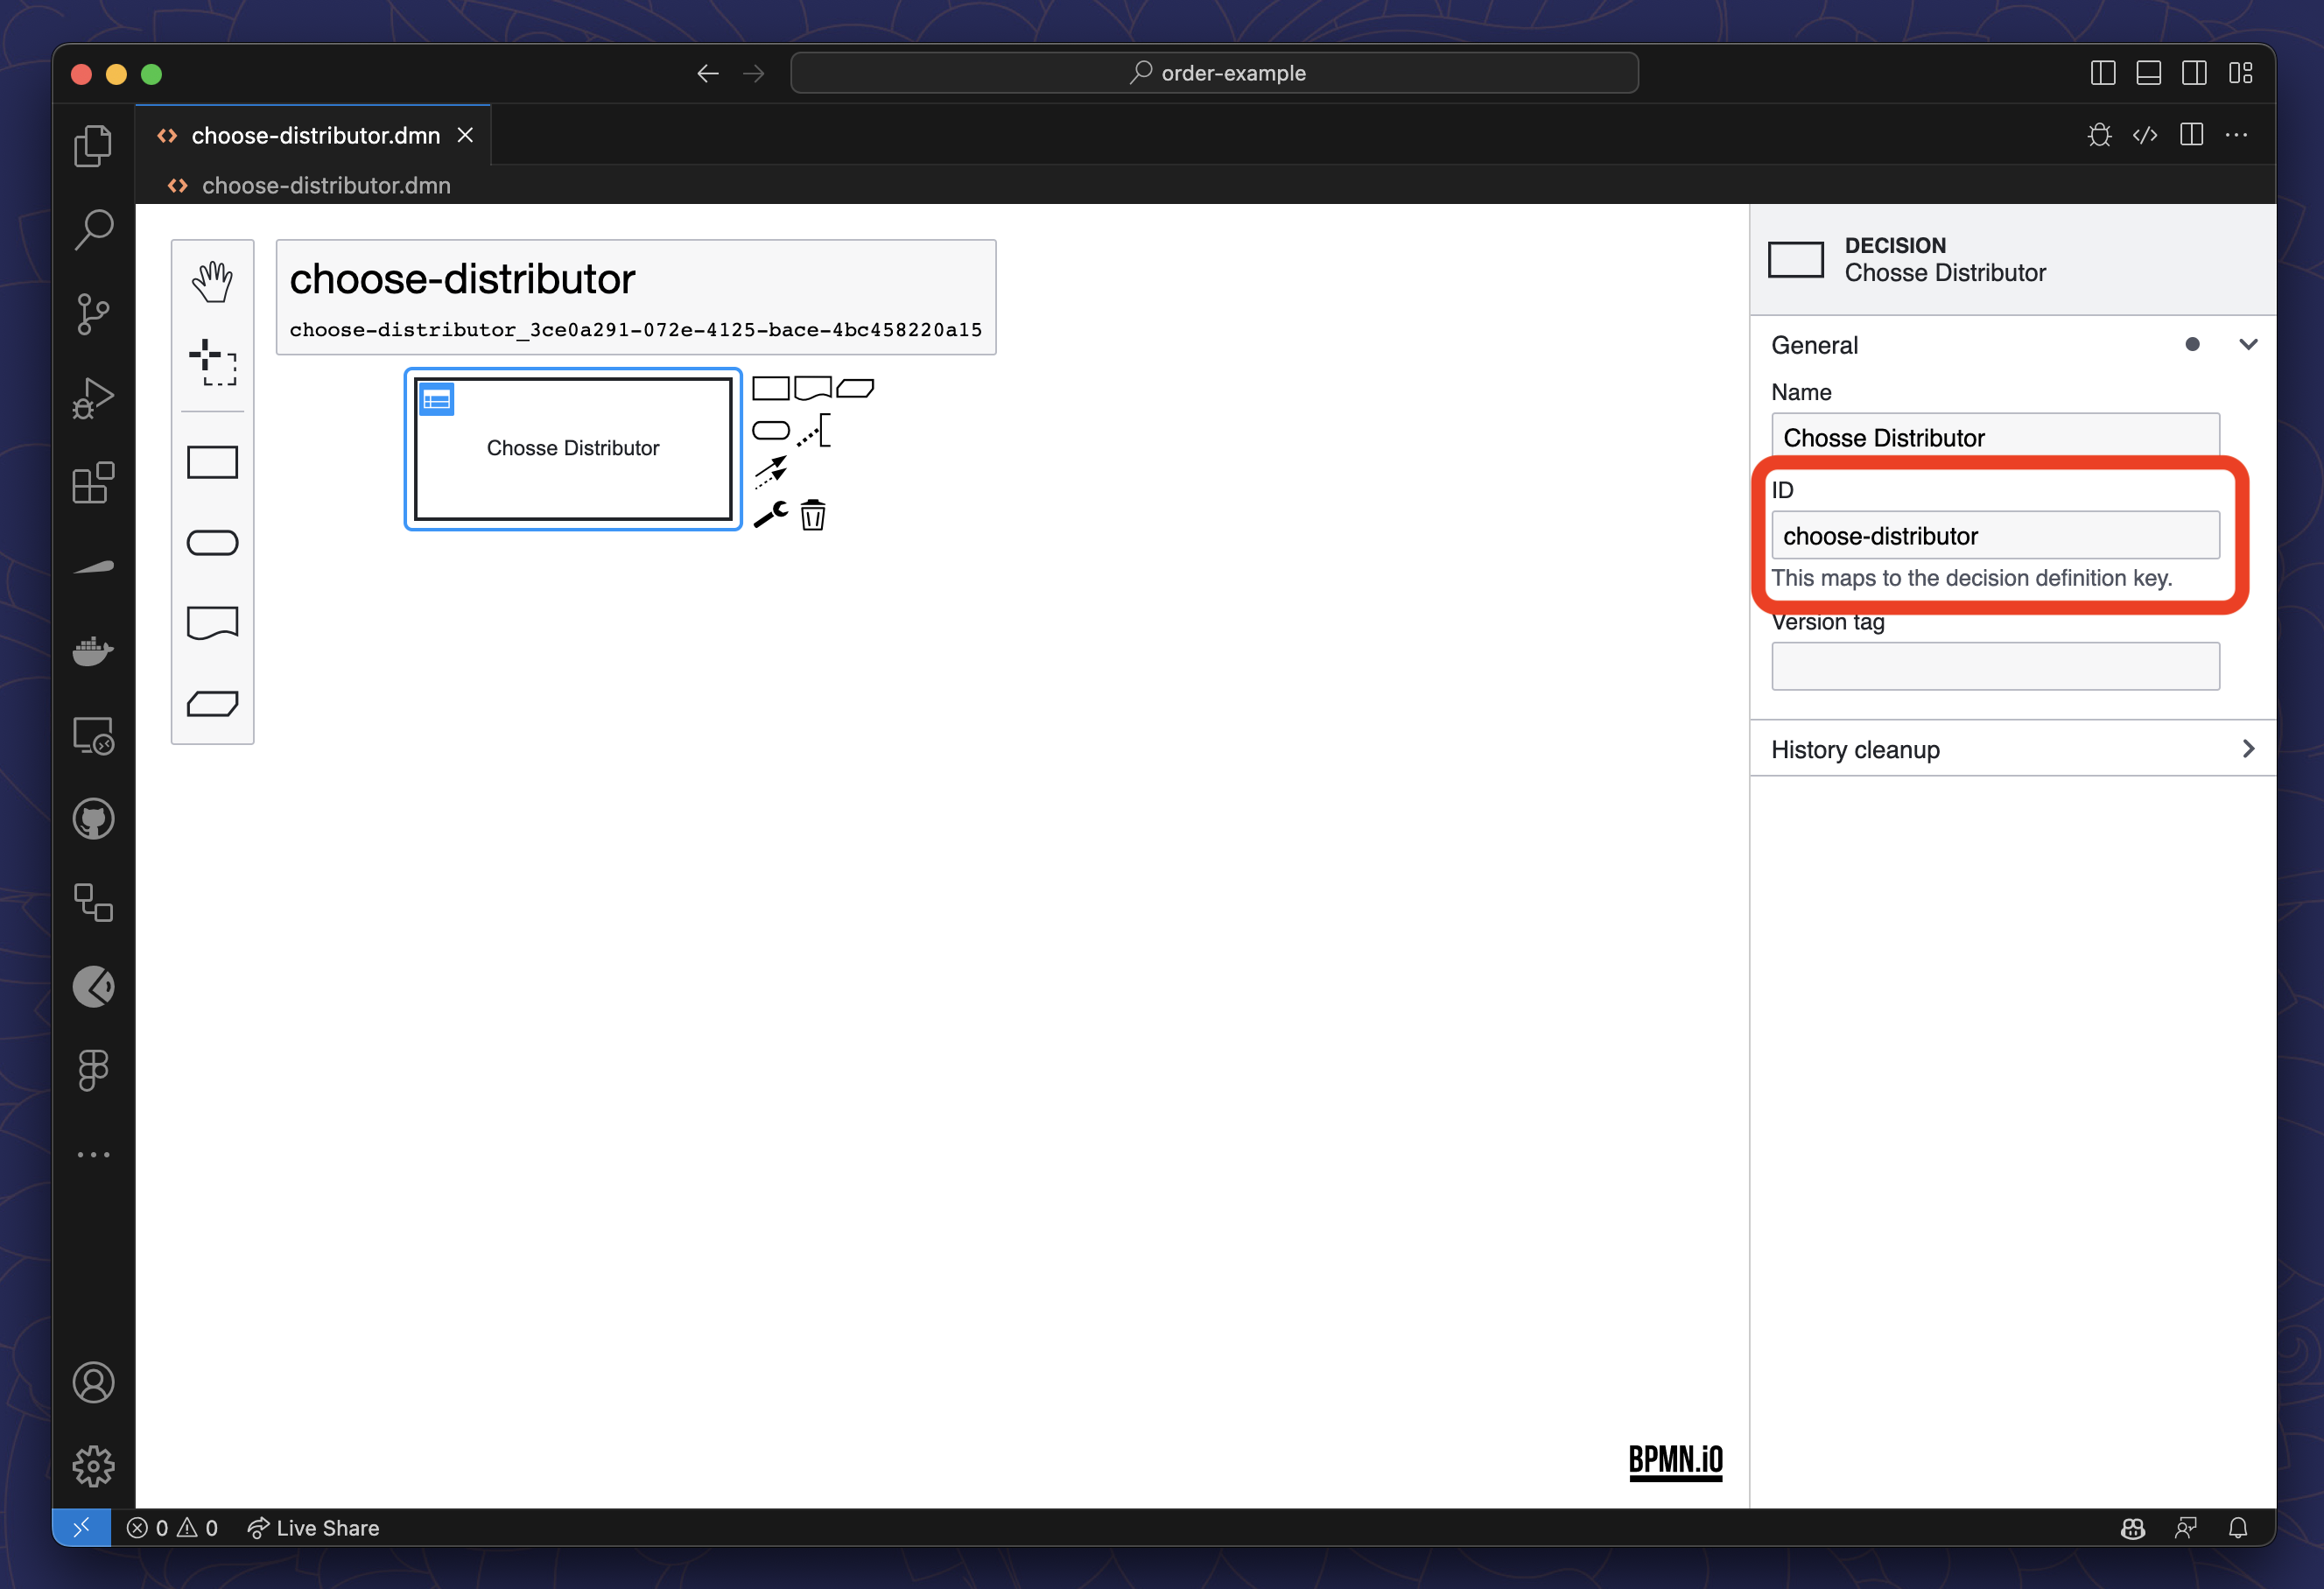
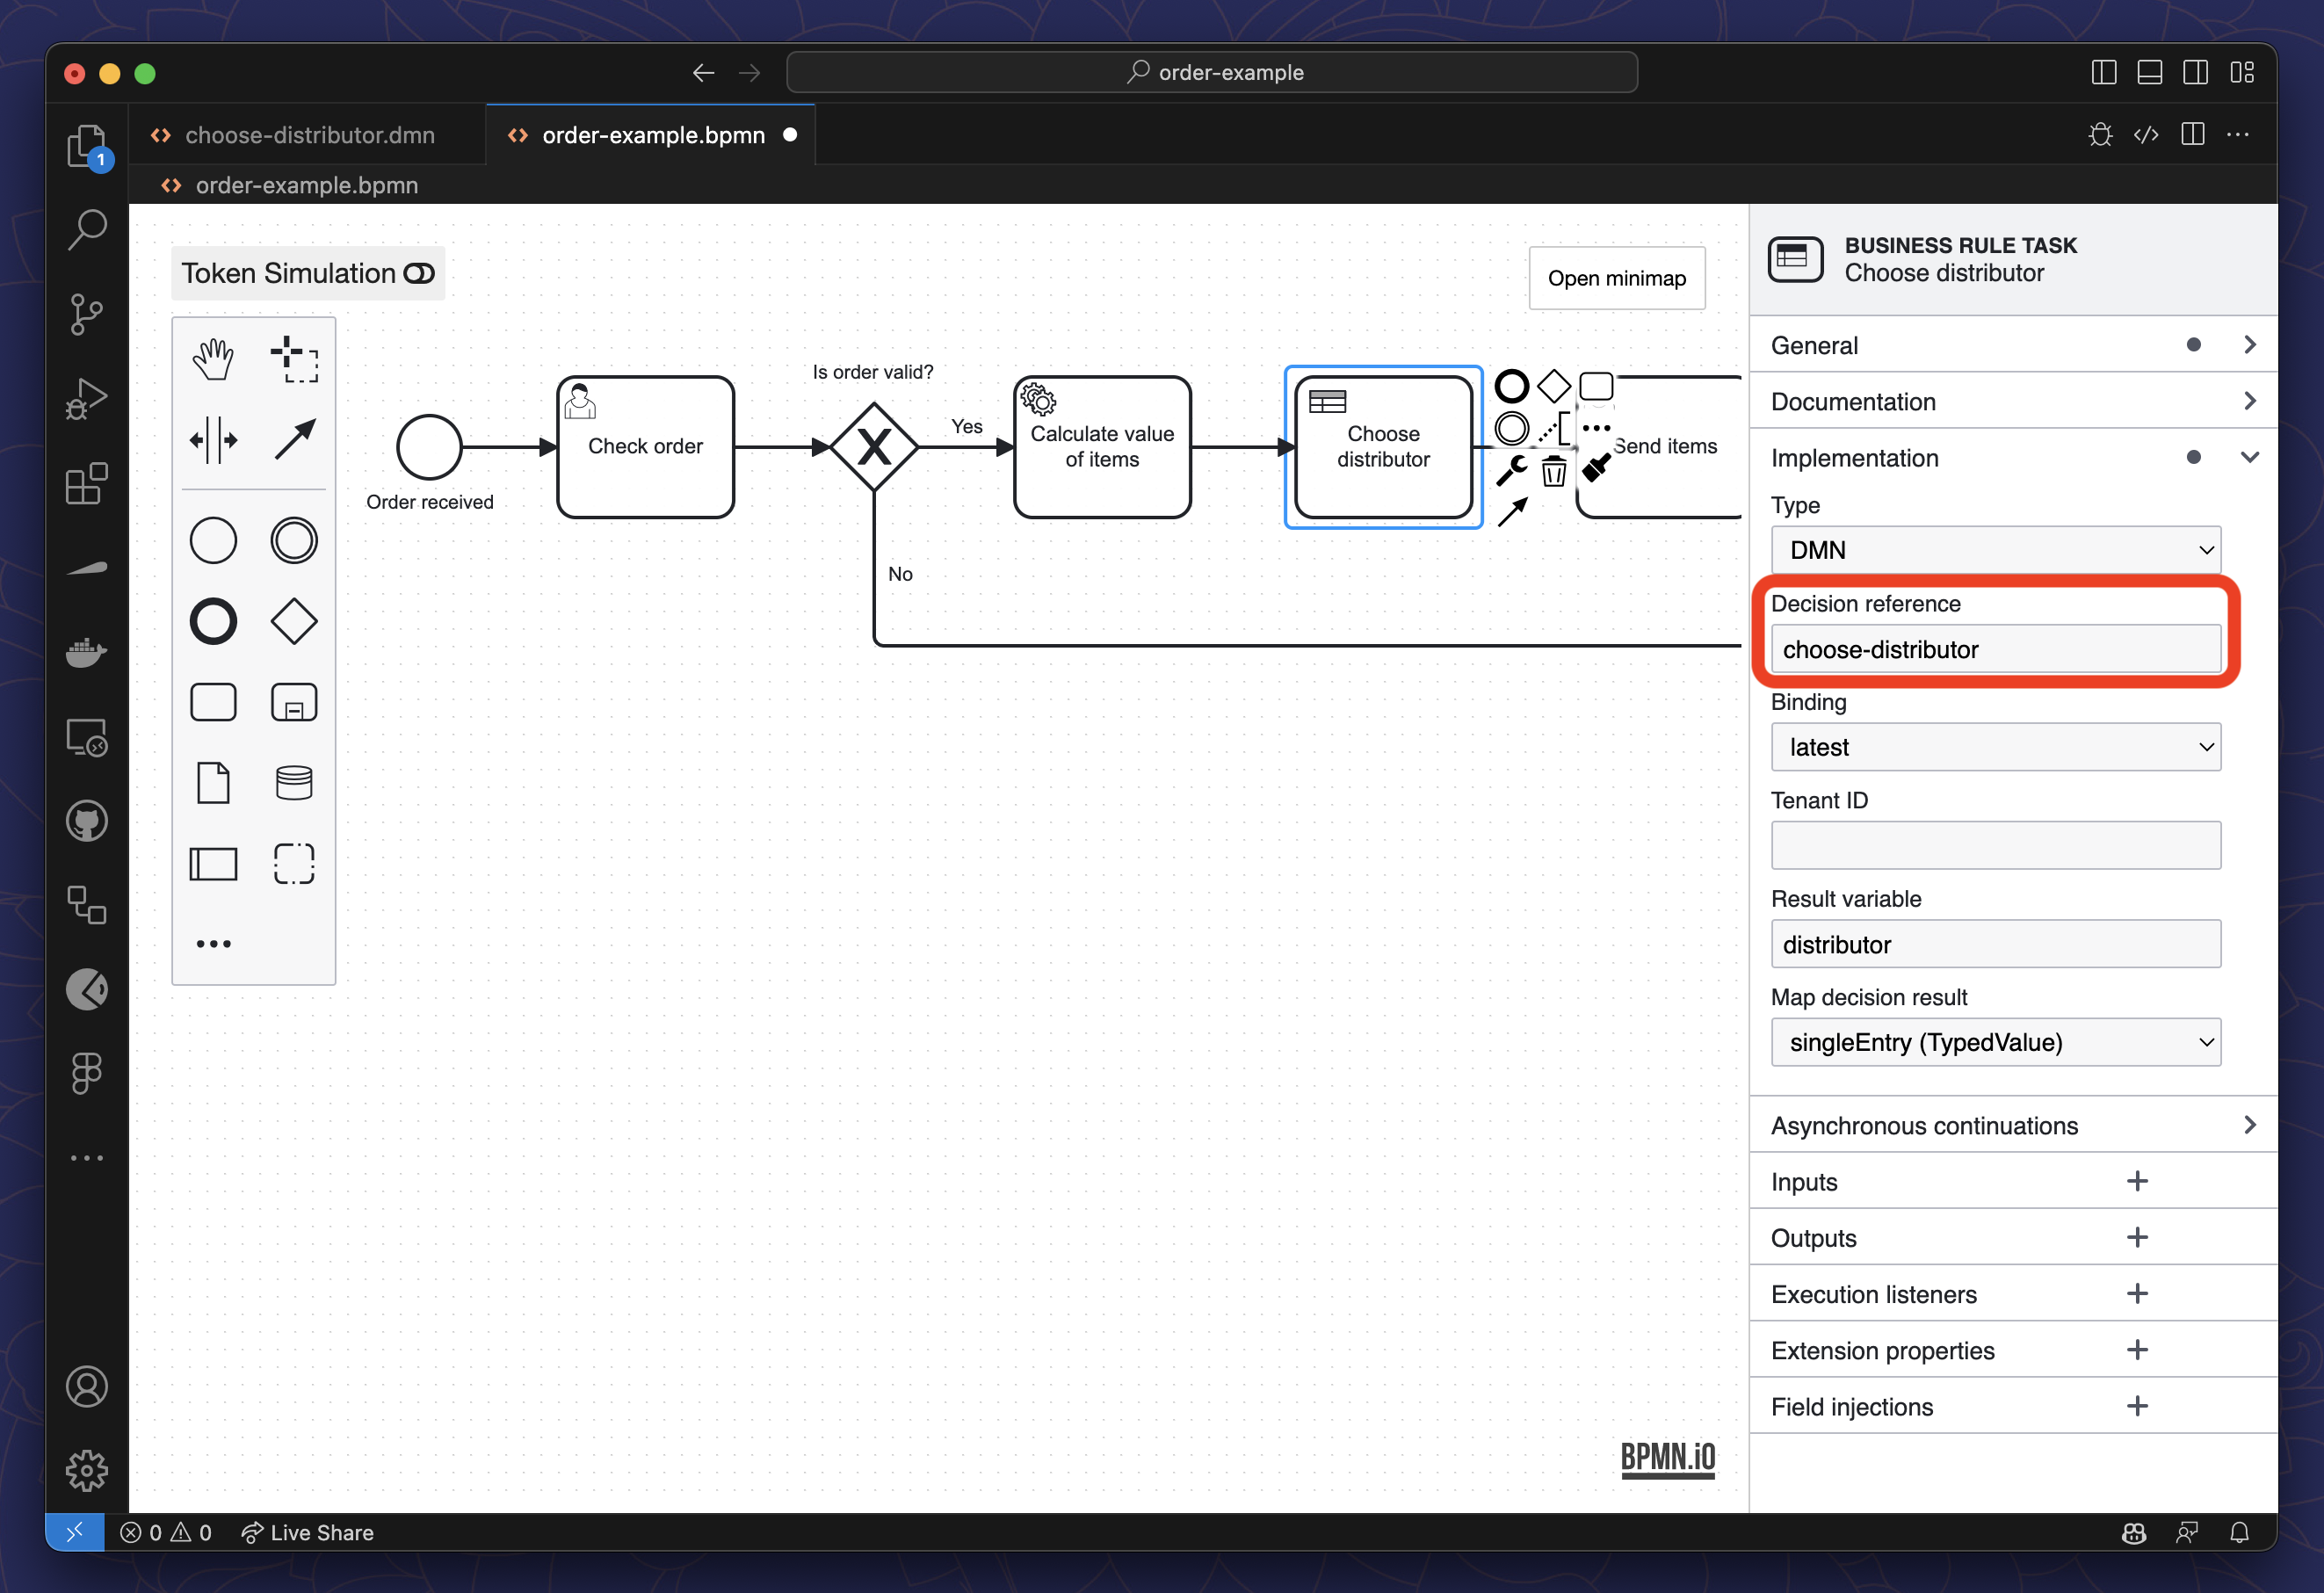
Enter the variable name that will hold the output of the decision in the
Result Variablefield.dmn.bpmn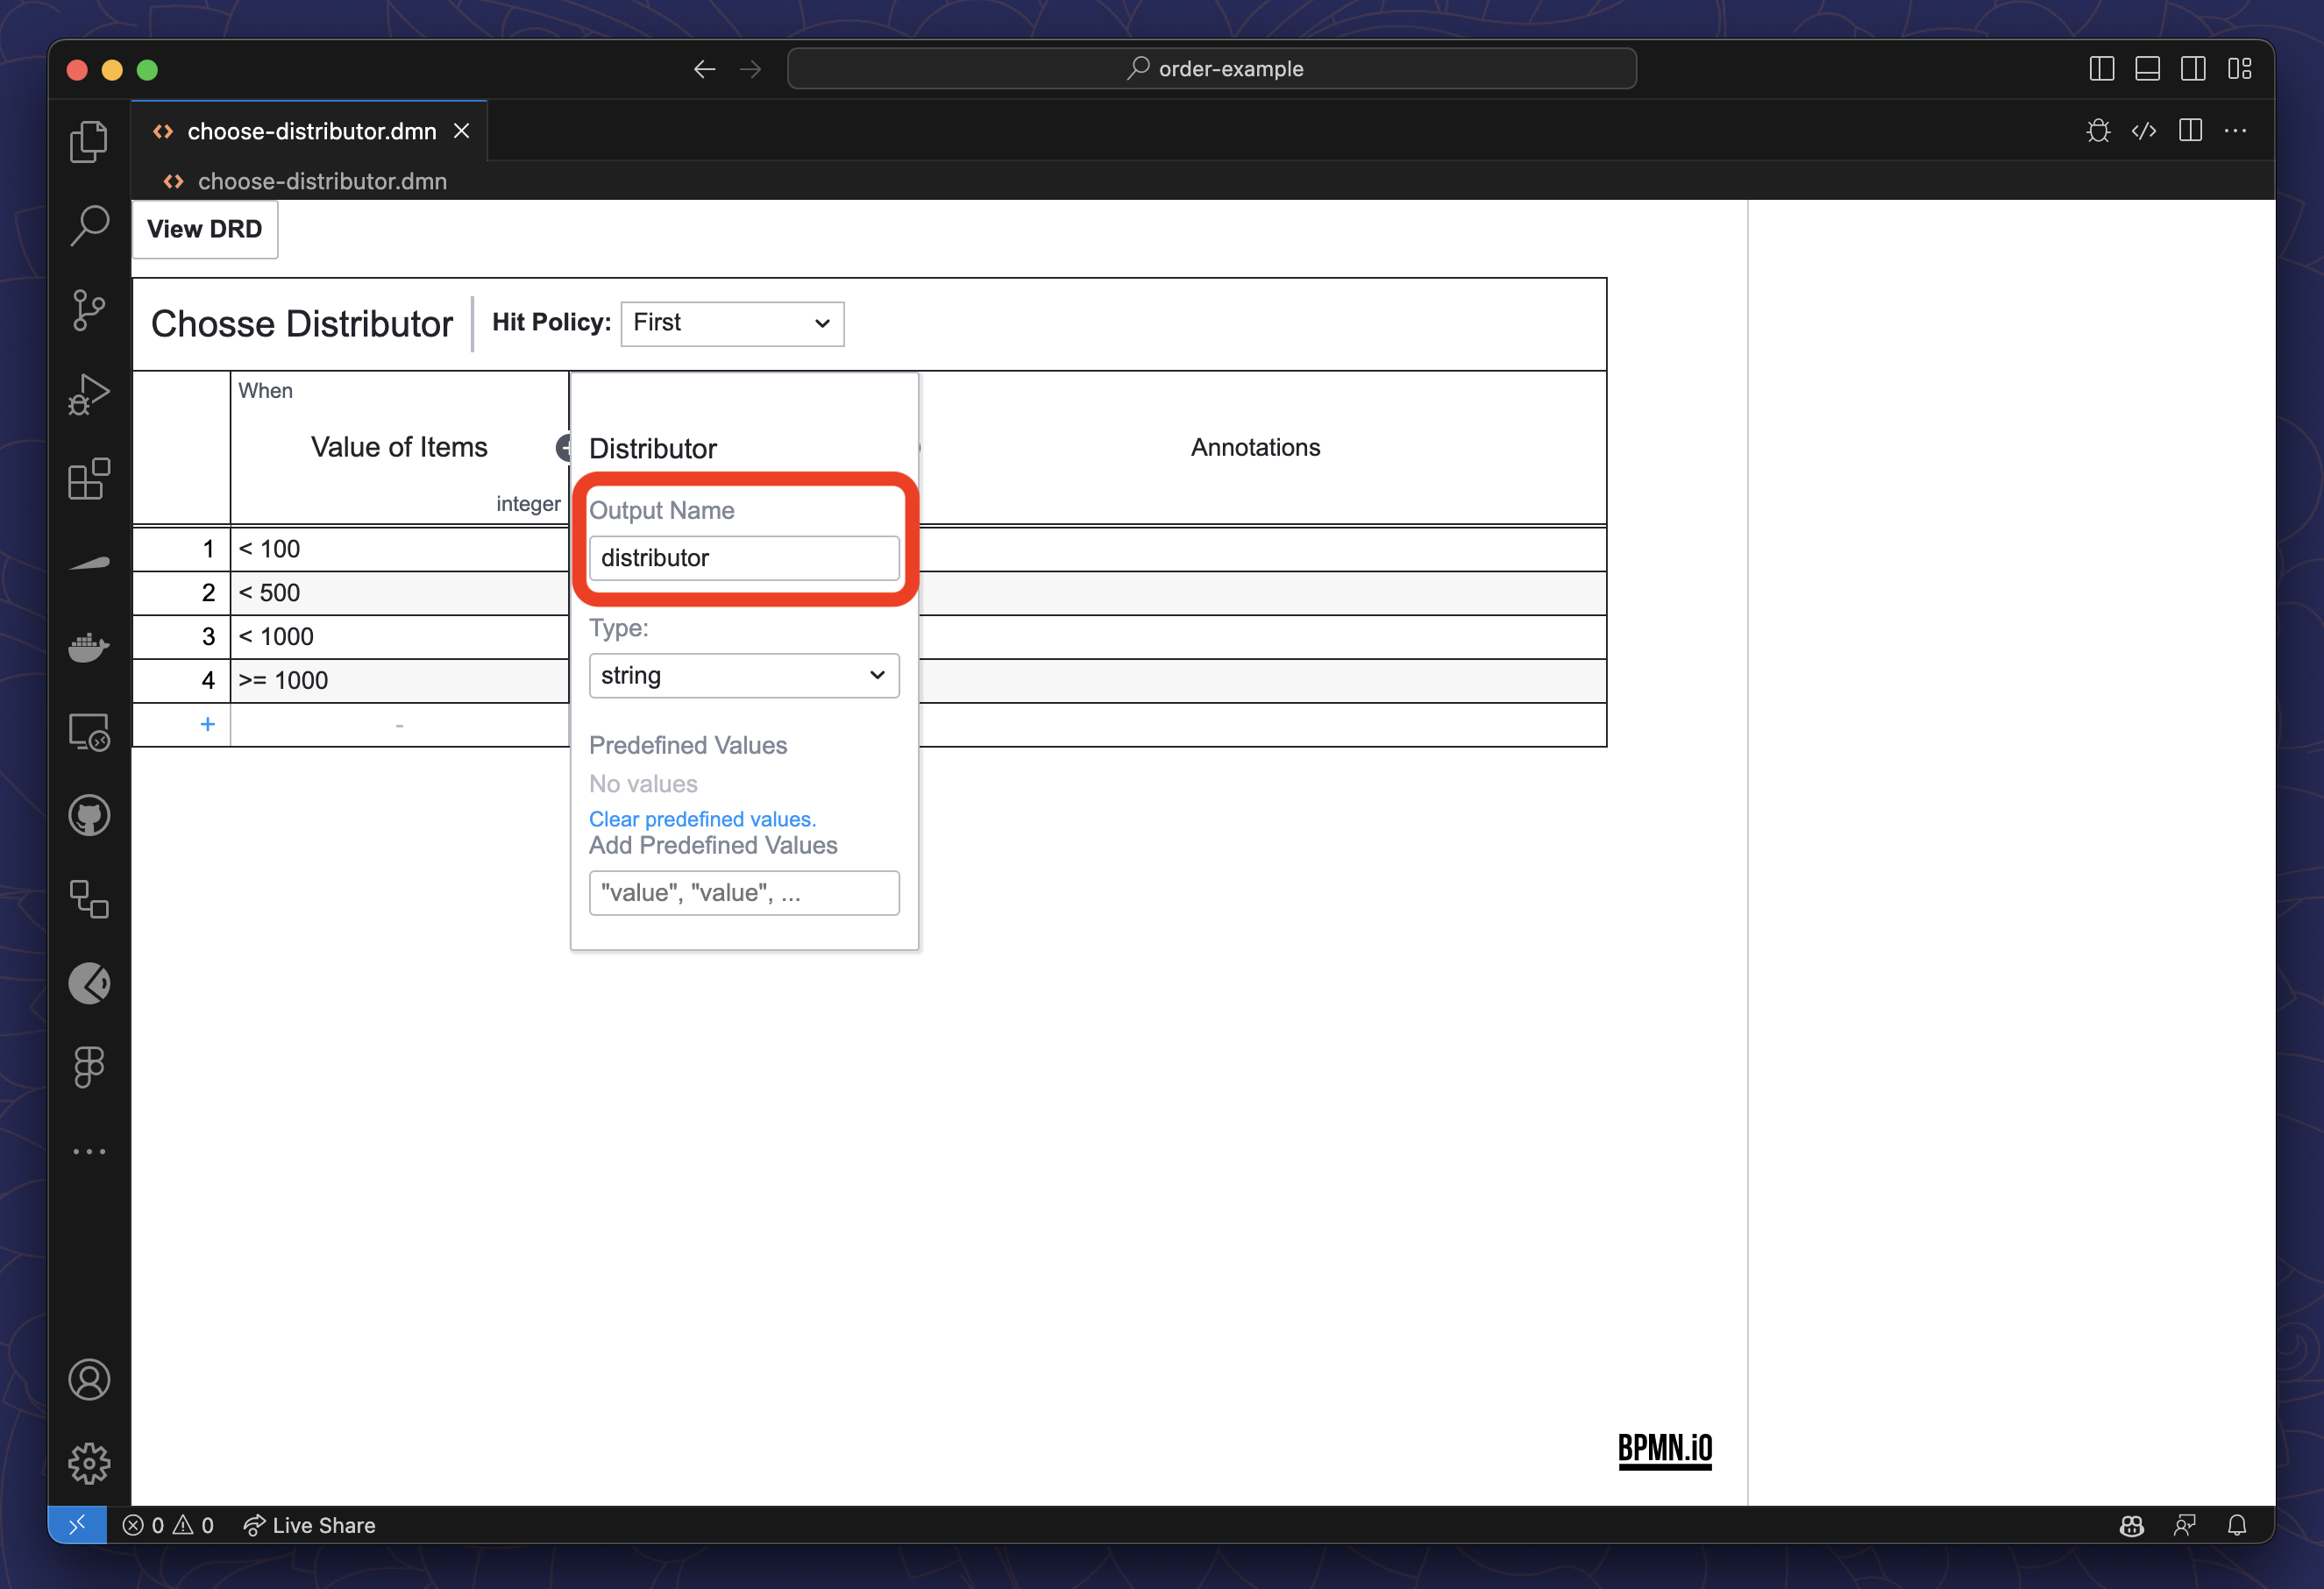
Add the input variable in the
Inputssection.dmn.bpmn